I say hopefully because my cats can be creative. And technically it’s not a “table,” it’s a plastic tub, but you get the point. This is Sheldon’s inside home, and hopefully will prevent Grimmy the wonder thief from stealing Sheldon’s greens. (No, he doesn’t eat them. He just plays with them. Because he’s an asshole cat, that’s why.)
NOTE: Adjust as you need to for size, critter whose enclosure you’re covering, etc. This basic plan can be used for any tortoise table, or any kind of enclosure. It’s easy to make, even a kid can do it as long as they know how to measure and use a hand saw without amputating a limb or something.
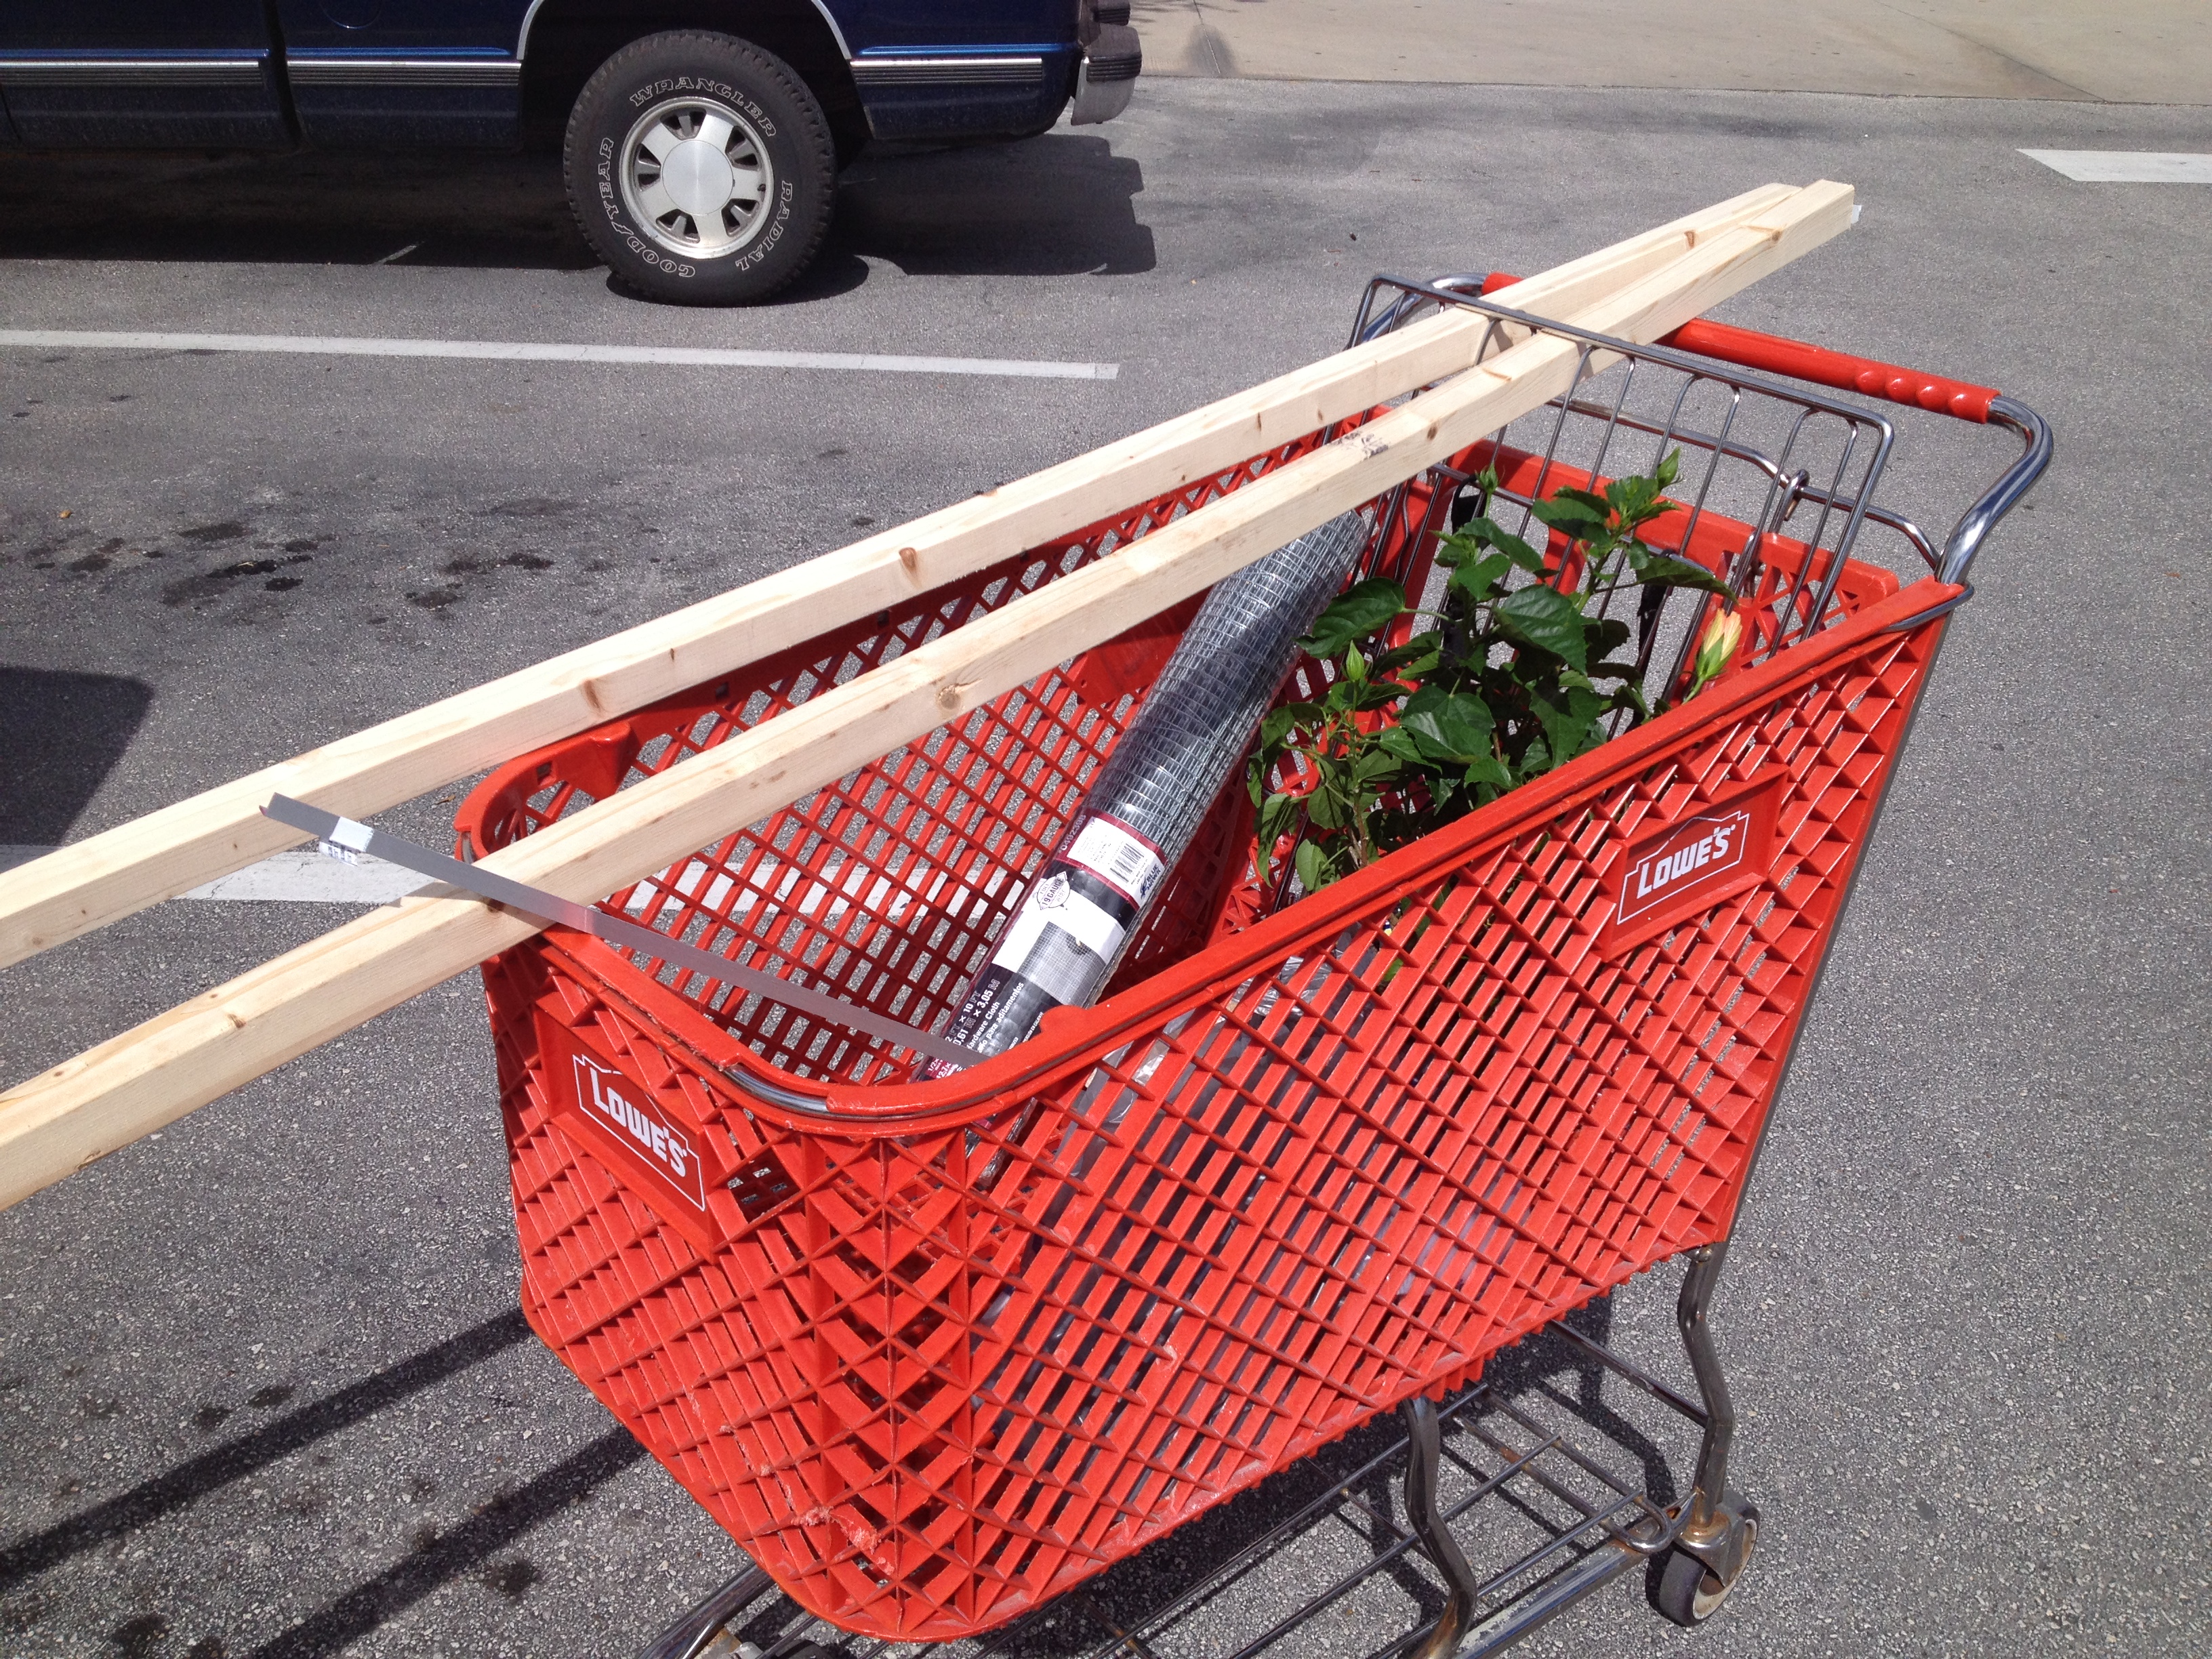
Start with a trip to the home improvement center of your choice. (Note, except for the Amazon link I provided for the RT thermometer gun, the packaging I’m showing of what I used is for reference only, not an endorsement of the products. I was not reimbursed by any companies for posting the pics–but if any of them want to, I wouldn’t refuse it. LOL)
Actually, it took me several trips to get everything. The first one was for the light, which I picked up a couple of weeks ago while out and about with Sir. It’s an 18″ under-counter fluorescent light fixture (the kind with the plug on it, not the hard-wired kind).

The painted pumpkin wreath and powercord for a MacBook Air are optional. (Yes, my office is a mess. Don’t judge.)
I picked up an 18″ Reptisun UVB bulb from the pet store to go in it.
Sheldon’s tub (which I picked up from Target) is about 32″ L x 16″ W. The top edge is slightly different because of the plastic clamps made to flip over and hold the plastic top on.
NOTE: I literally engineered this on the fly while I was in Lowe’s buying stuff. It’s not pretty, but it took me less than an hour to make. If you want to over-engineer it, knock yourself out, but I wanted it done fast and pretty was not a concern. So please, don’t razz me for not mitering corners, whatever. Any person in an apartment can make this without special tools or skills. A kid old enough to handle a handsaw and tin snips without decapitating themselves can make it, so…there.
Also note: If you have dogs or are making this for a species of animal that is an escape artist, add bungee cords or lid catches or something to your design to prevent the lid from being lifted off.
Materials list (adjust as necessary for your application):
- 2 – 8′ long 2×2’s (MAKE SURE it is NOT pressure-treated!!!! The chemicals can off-gas and harm your tortoise! If you are not sure, ASK. You do NOT want PT wood. NOT. NOOOTTTT.)
- hardware cloth or other mesh (I went with 1/2″ x 1/2″ size squares because I wanted stability against the average weight of a cat, but not so small it blocked light from the basking lamp. Also KEY point: If you mount your UVB light over the tank top instead of inside it, you want larger mesh, not smaller, because it will block the UVB. ALSO, be VERY careful if you use plastic mesh. It can melt under the heat of a lamp. But if you’re not trying to keep cats out, rock on and go for it.)
- self-tapping screws (You can use nails if you want. I did not want to, I wanted easy. Make sure the screws will fit through the holes in the brackets.)
- ratcheting screwdriver, electric screwdriver, or drill (if you do this manually, you are a better person than I am)
- staple gun and staples (I went with 3/8″ long staples)
- 4 – L-shaped brackets that are about 1.5″ x 1.5: on each side, they fit the 2x’s pieces of wood
- 4 – 90-degree corner brackets like you’d use to join 2×4’s together (they’re narrow enough they’ll work with the 2×2’s)
- 4 – 2″x5″ plates (for the corners)
- handsaw or hacksaw of some sort, I literally used an old hacksaw with a dull blade because I couldn’t find my handsaw and I wasn’t about to drag the dang circular saw out just for this.
- tin snips or cutters that will cut the hardware cloth/mesh
- tape measure
- pencil
- hammer
Note on the brackets: They were in the lumber section. They have a whole shit-ton of a selection of brackets there, so find what’s going to work for you. But if you need hinges, etc. they’re usually in the hardware or cabinet section.
Okay, for the measurements. I wanted my cover to fit over (as opposed to sitting flush on top of) the tub. If you want yours to sit flush on top of your enclosure and be hinged or something, then adjust accordingly. Depending on your tub/tank/enclosure, measure the width and length you want it. I measured mine so that the long sides extended to cover the ends of the shorter cross pieces. I also added a little wiggle room so I didn’t have to cut out a hole in the plastic tub for the cord for the light fixture.
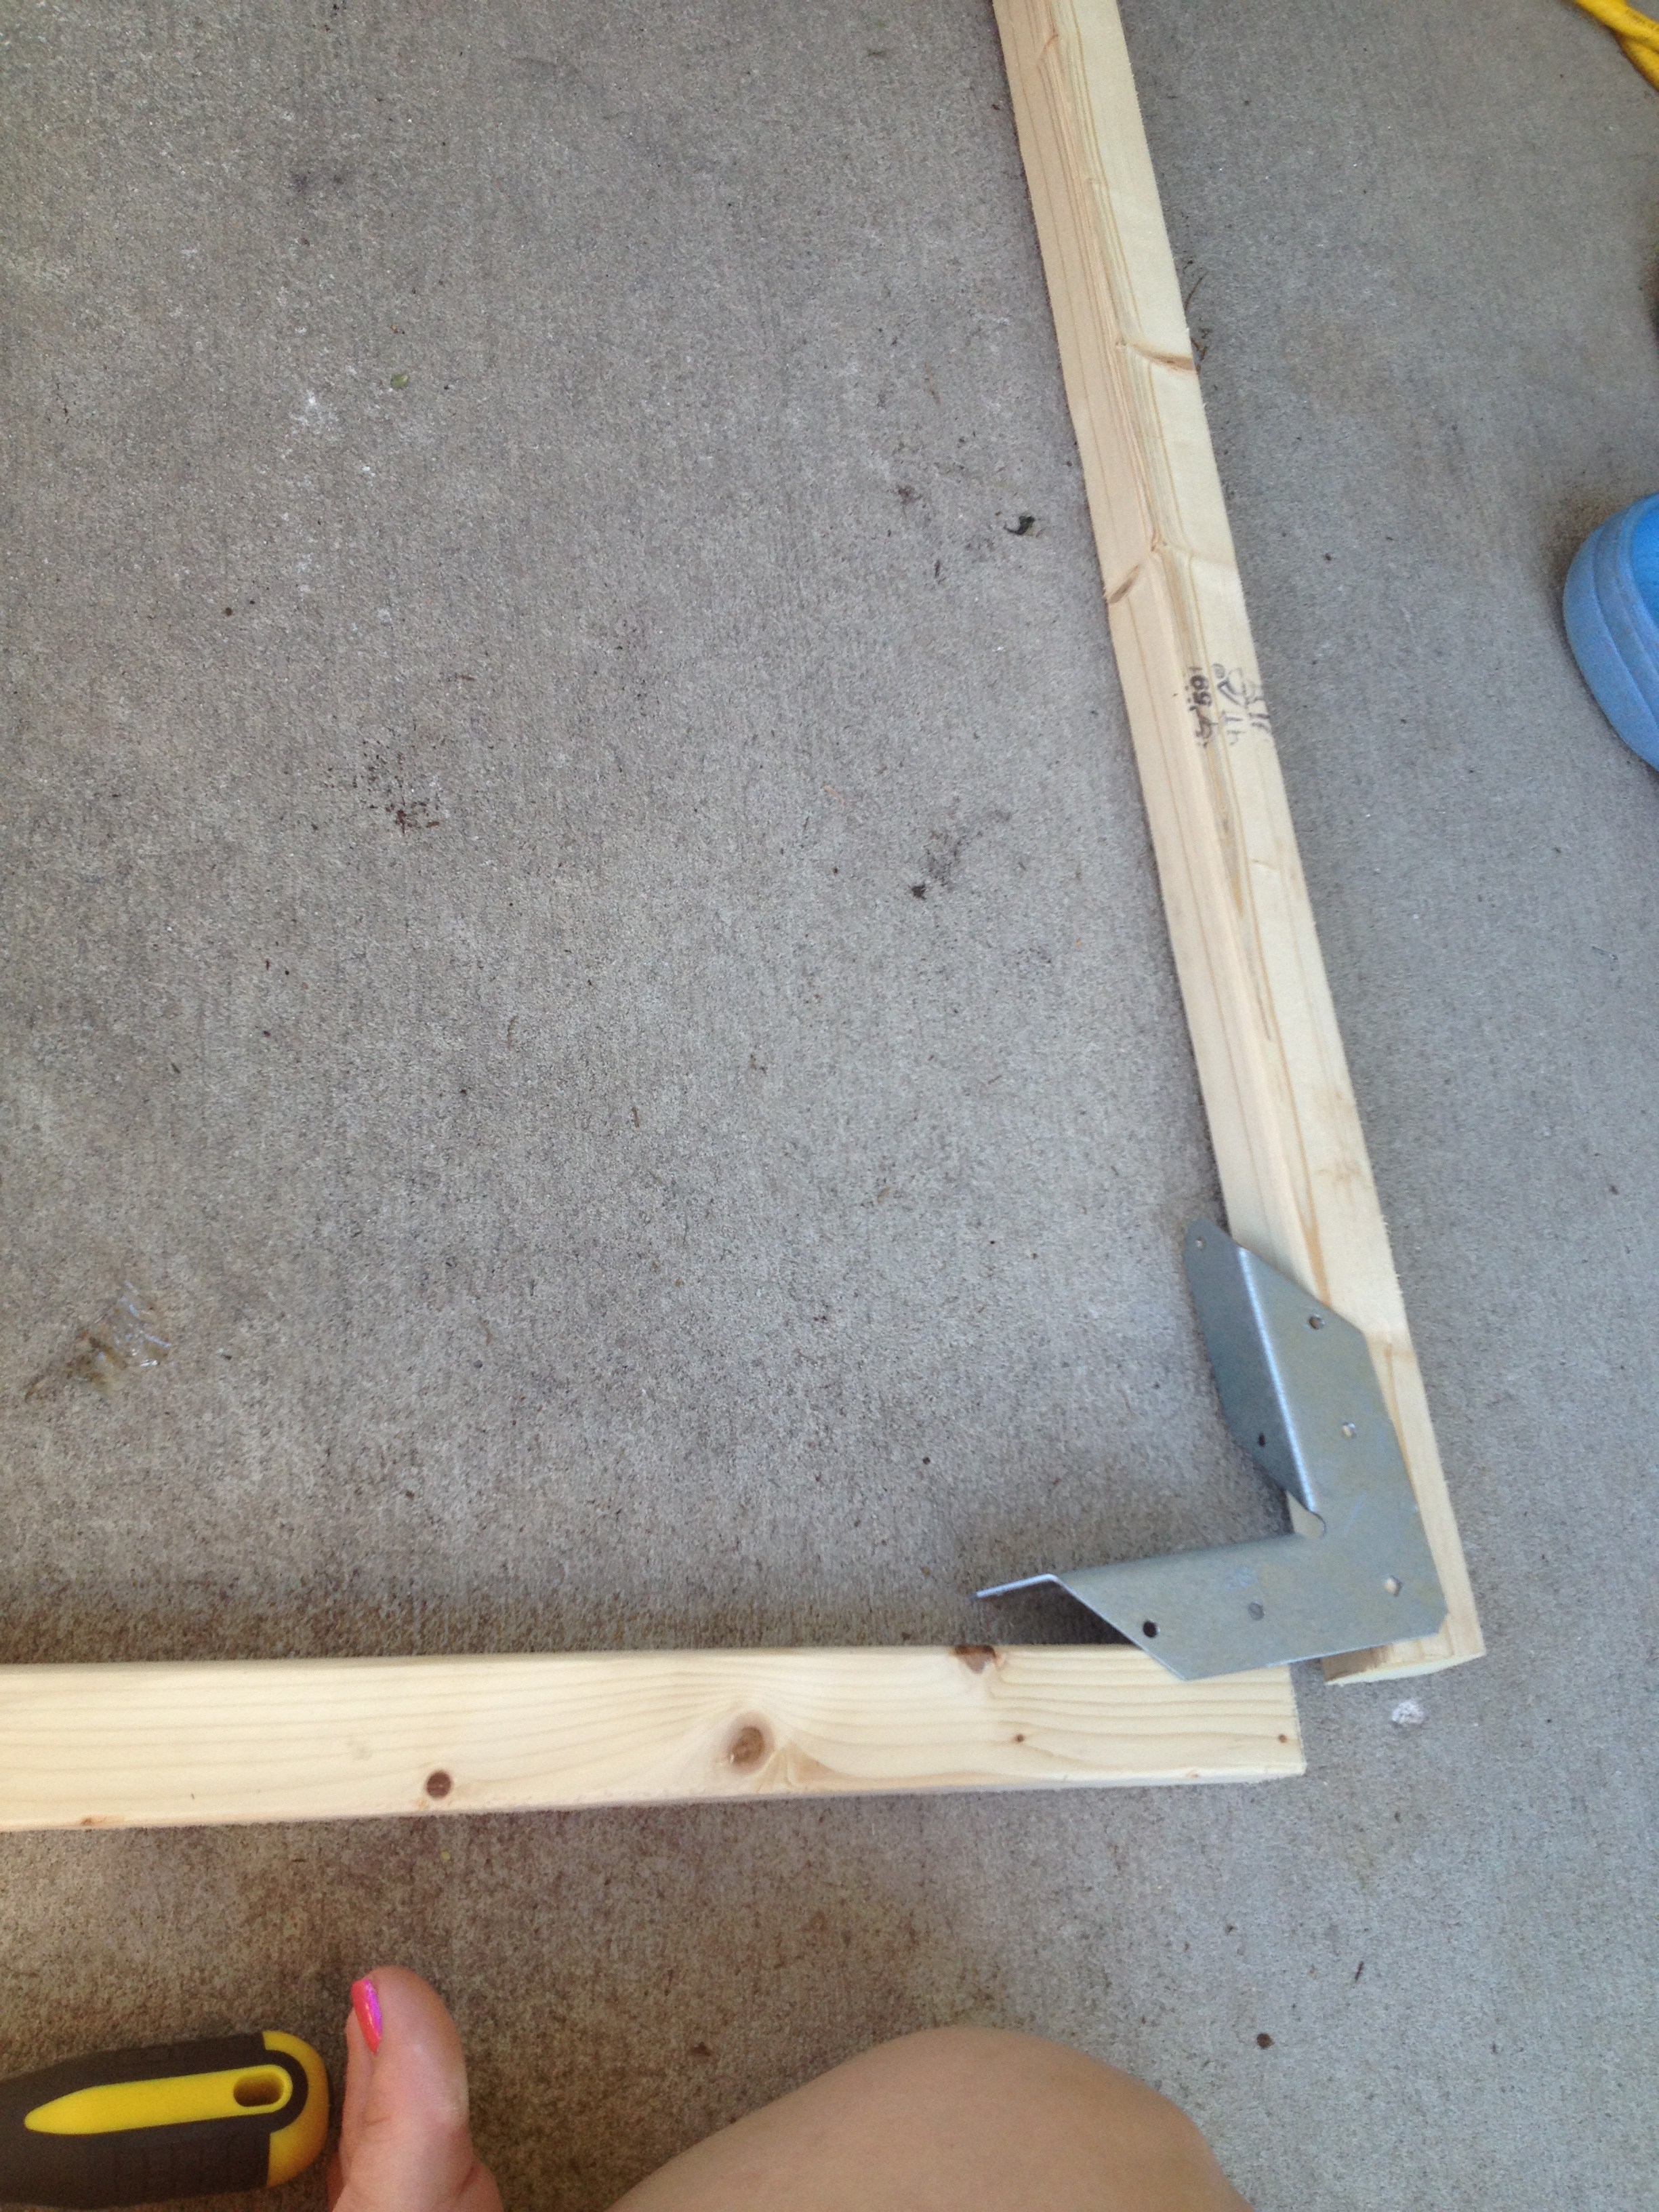
The piece at the top is a lengthwise piece. This is actually the underside of the lid. That’s the 90-degree bracket I was describing. Screw the brackets and wood together and double-check your fit before you go any farther.
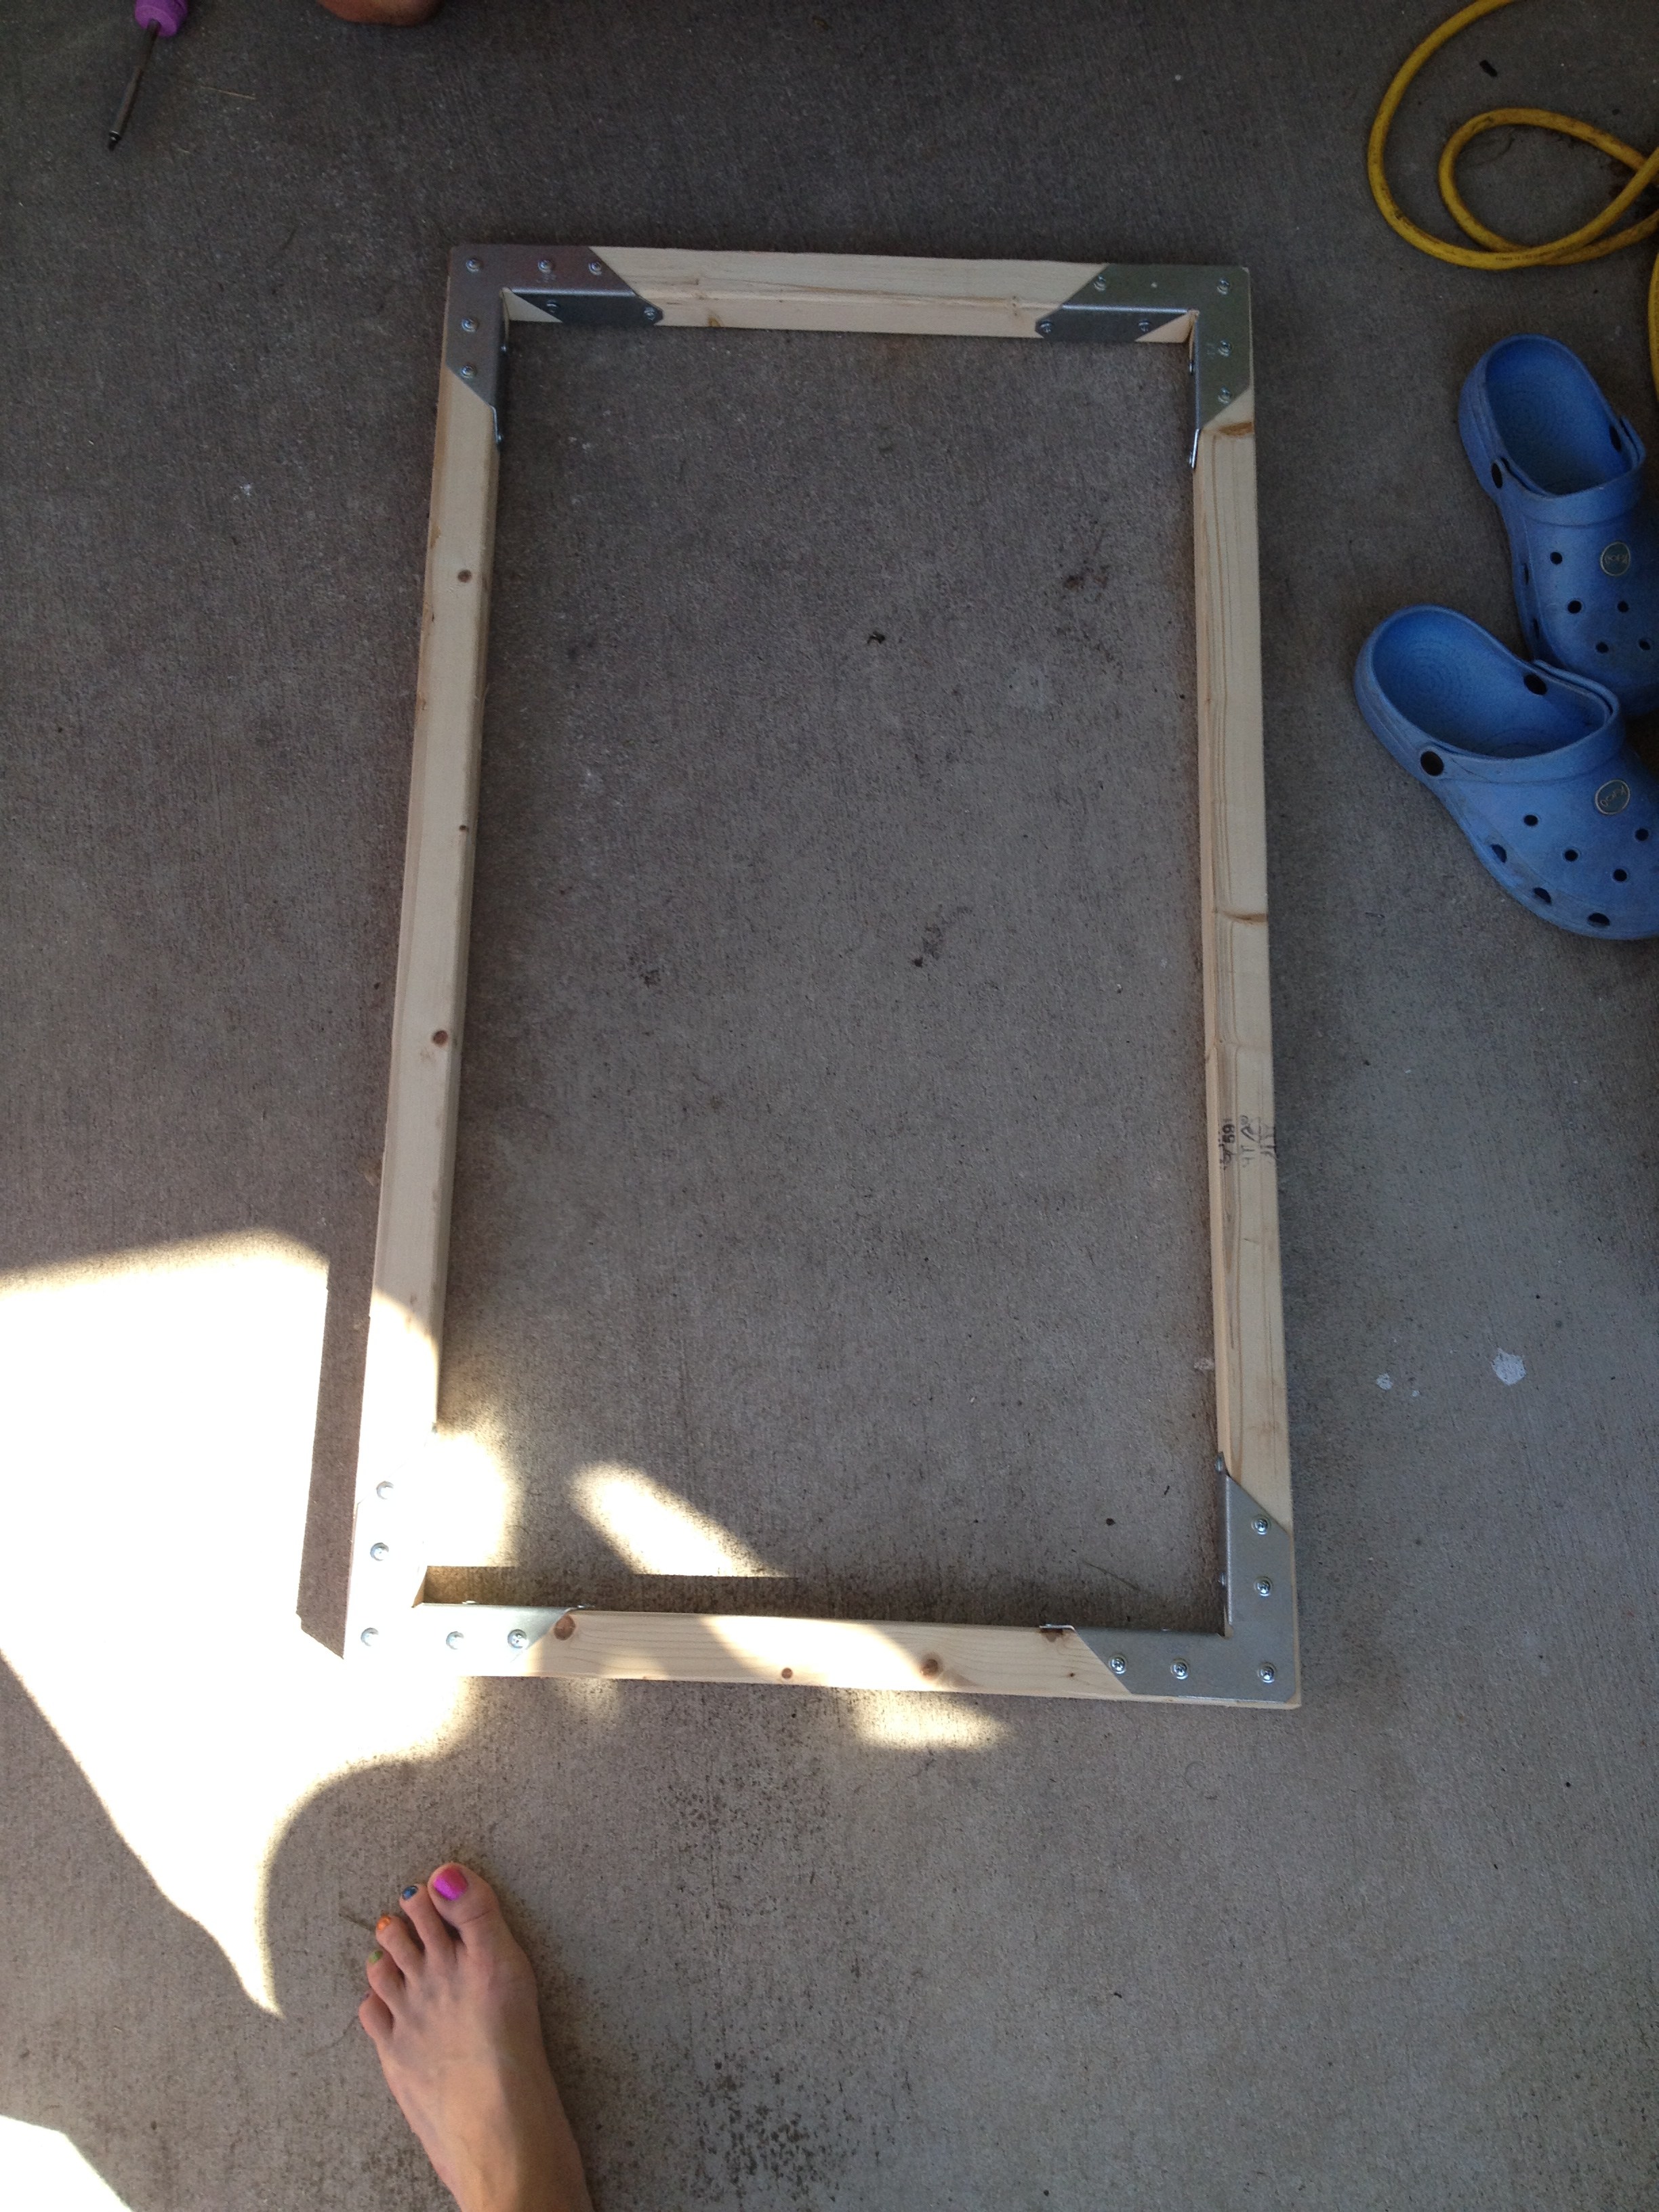
That’s what it looks like all screwed together. (Yes, I probably didn’t need to use all the screw holes, but anything worth doing half-assed is worth over-engineering.) Remember, this is the underside.
Flip it over.
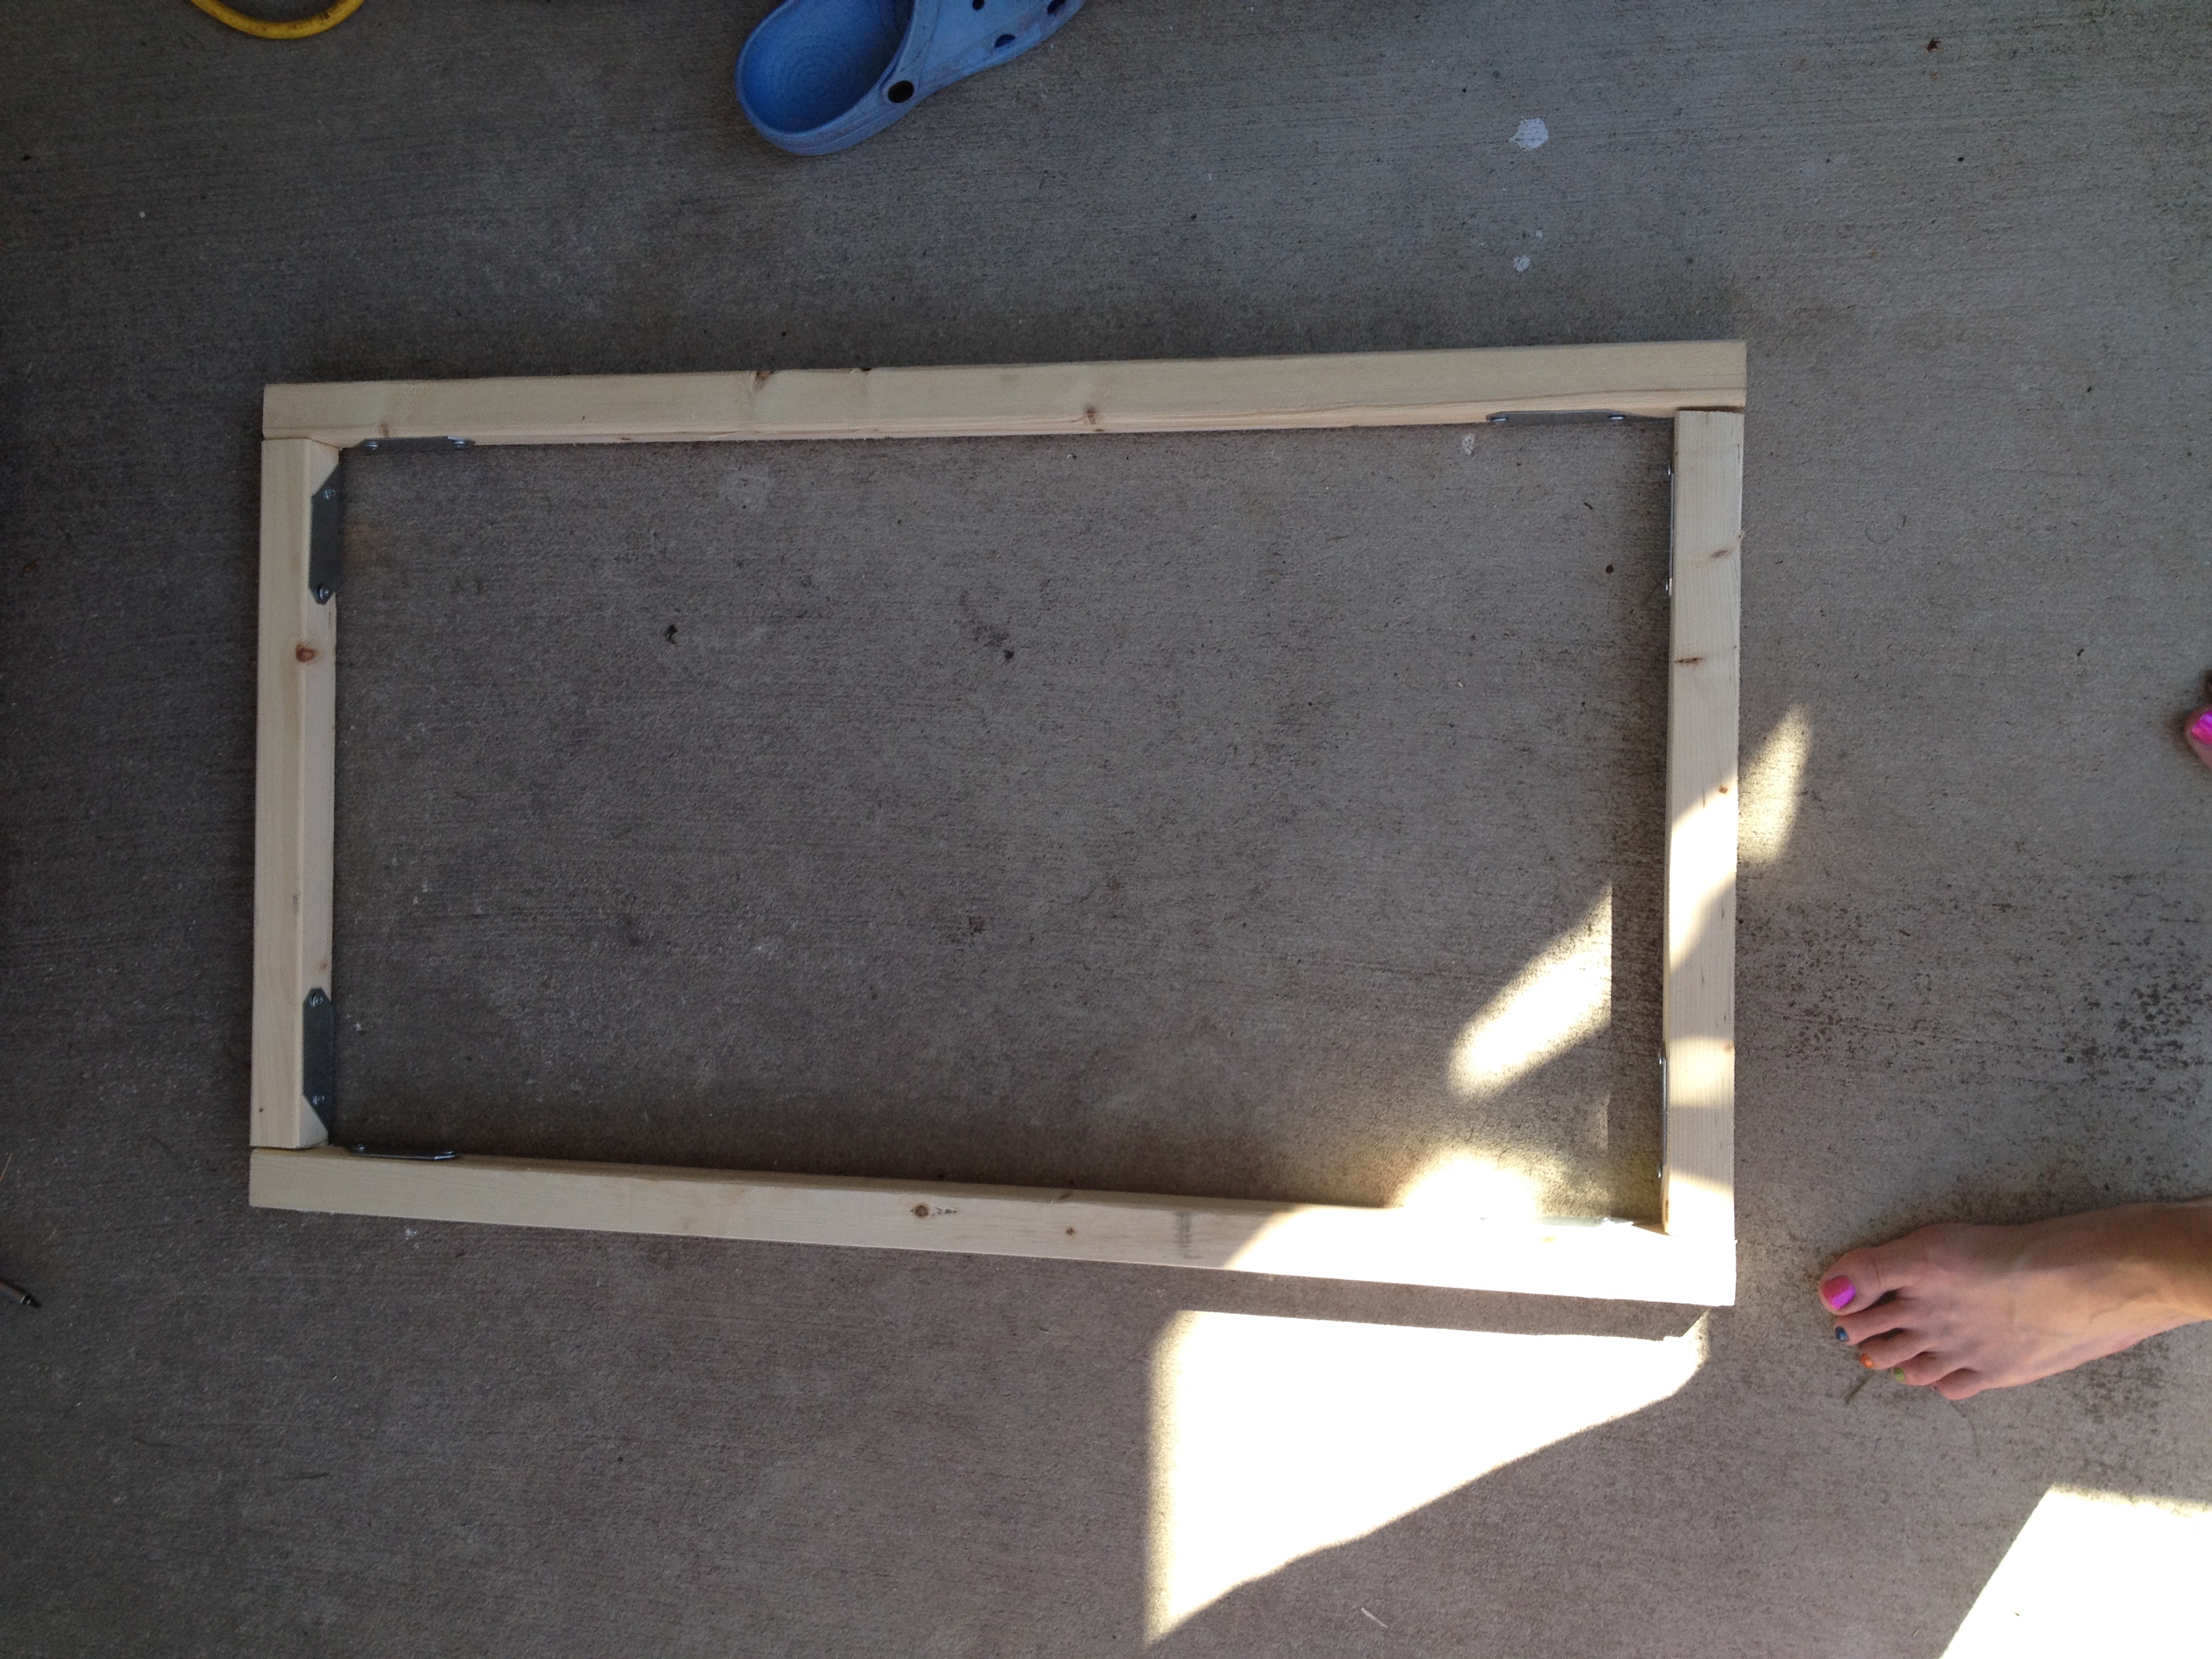
What you’re looking at is the top of the…top.
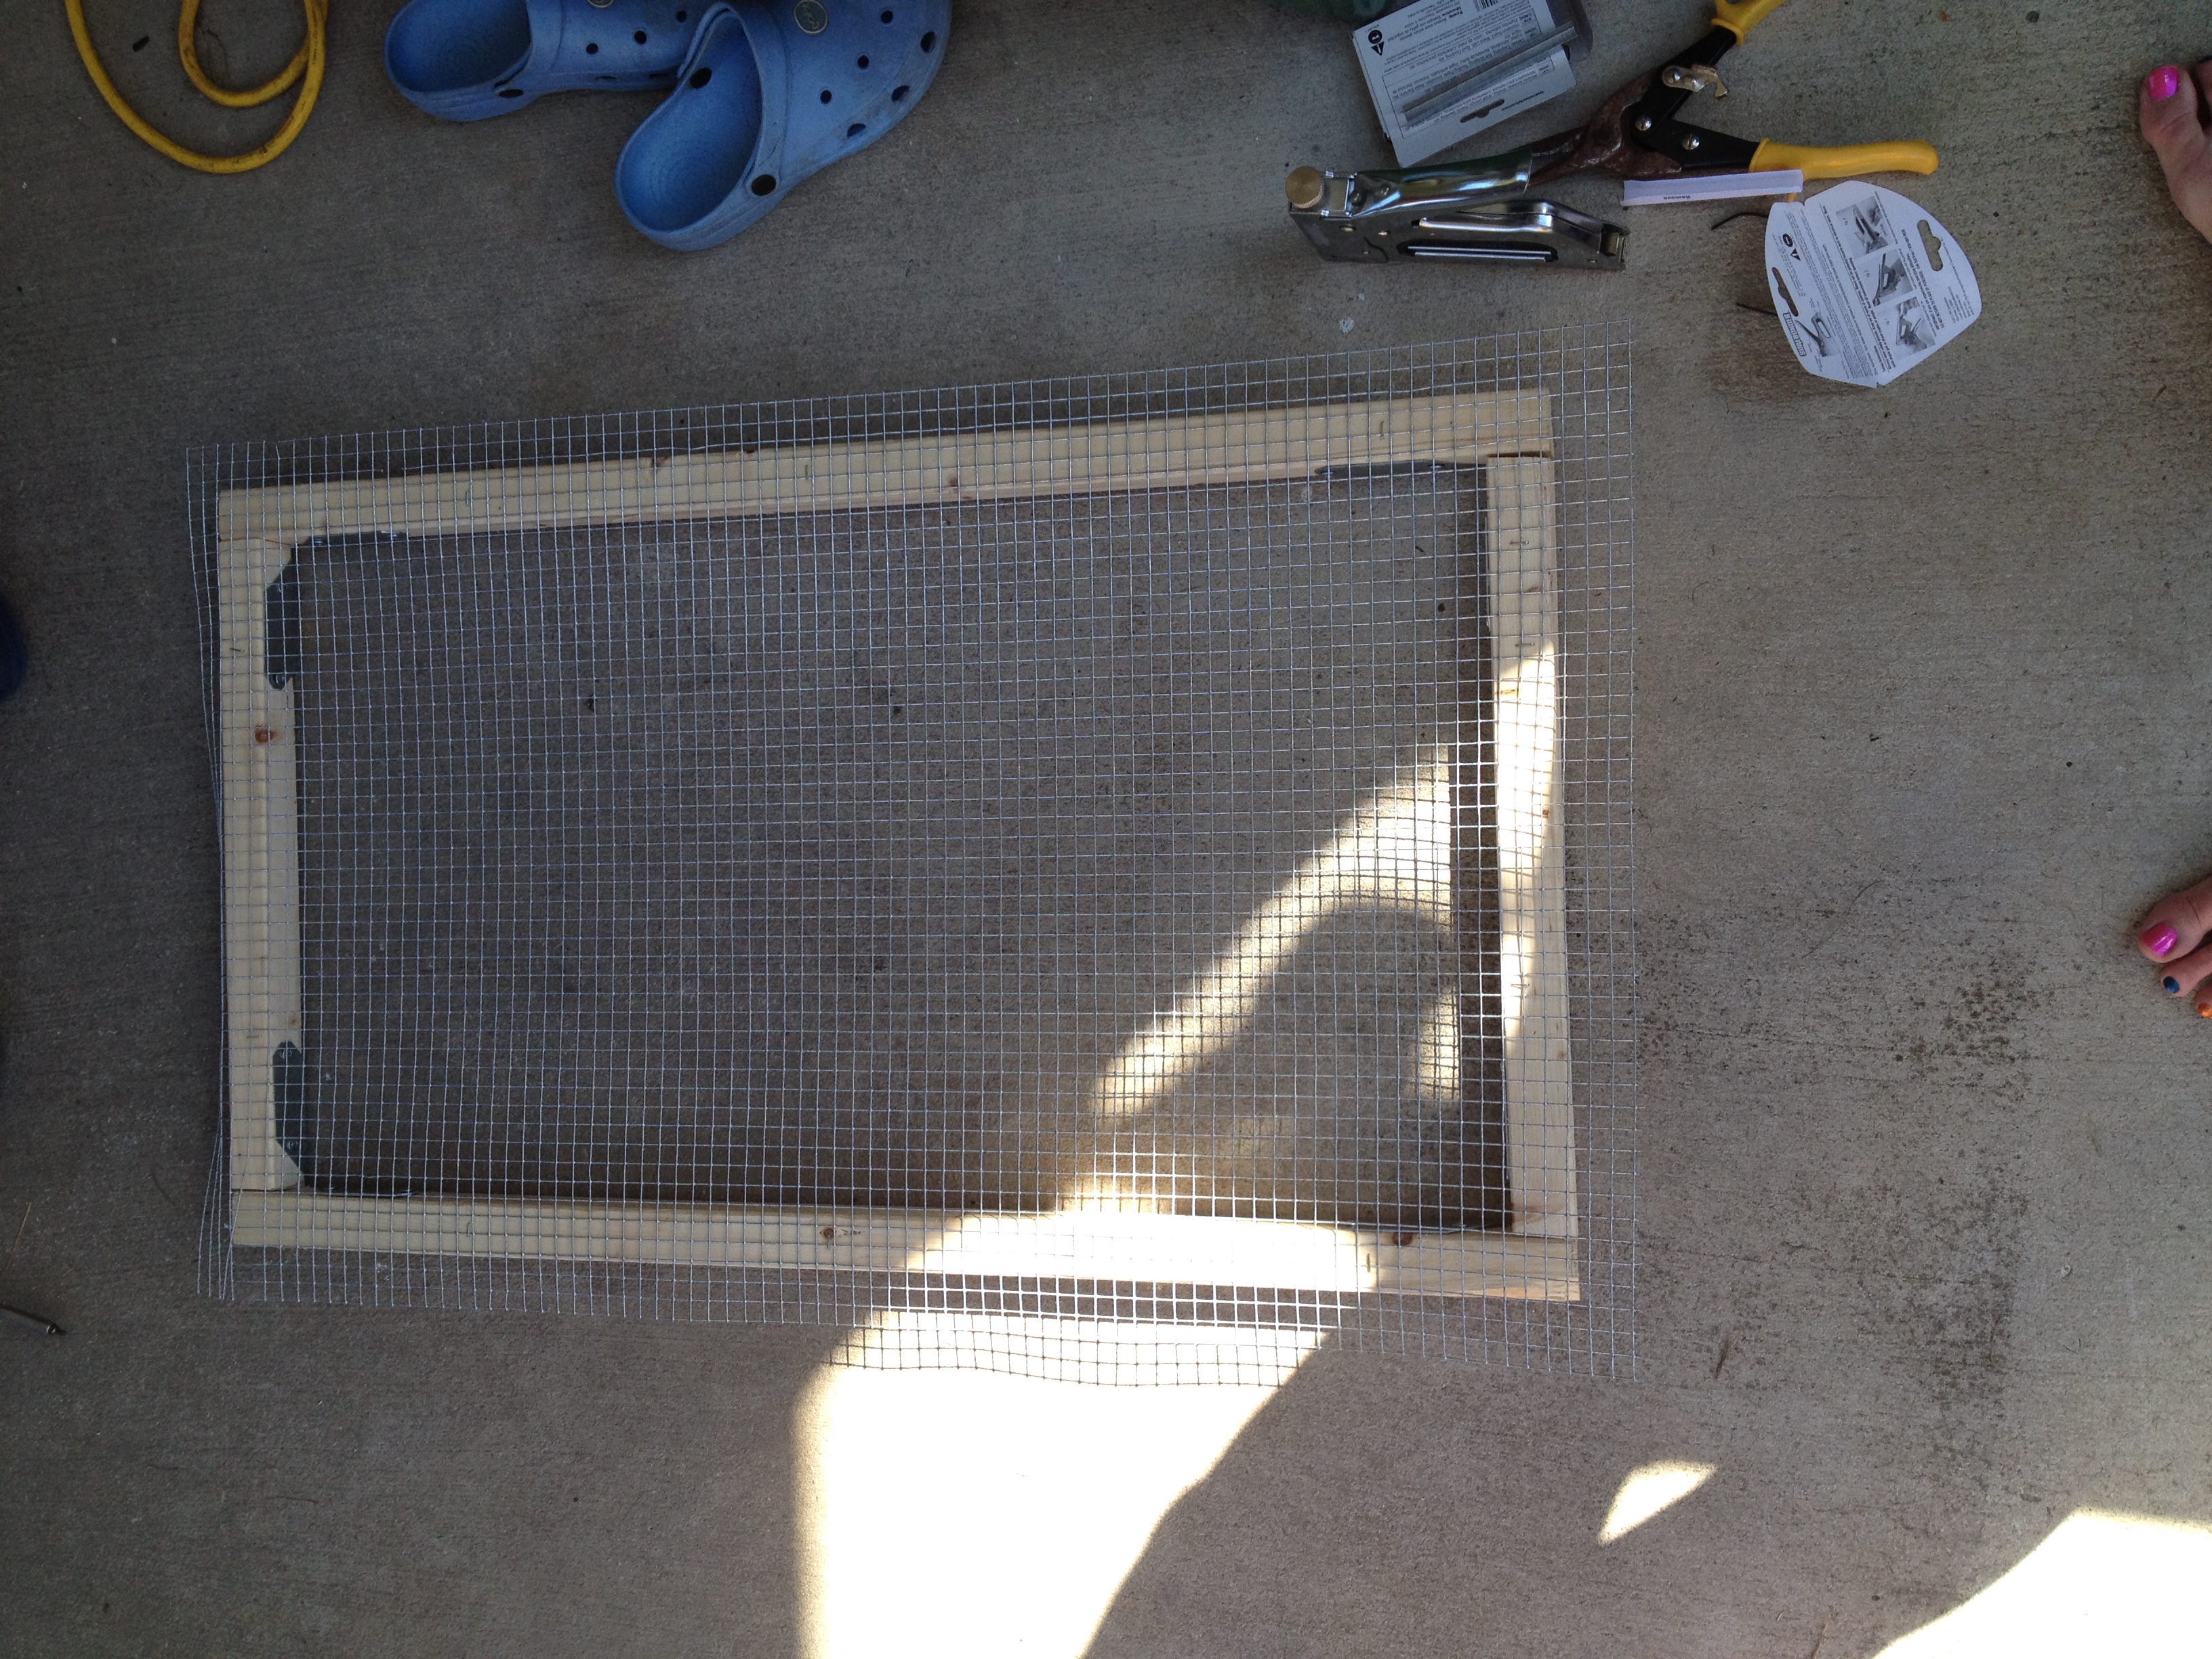
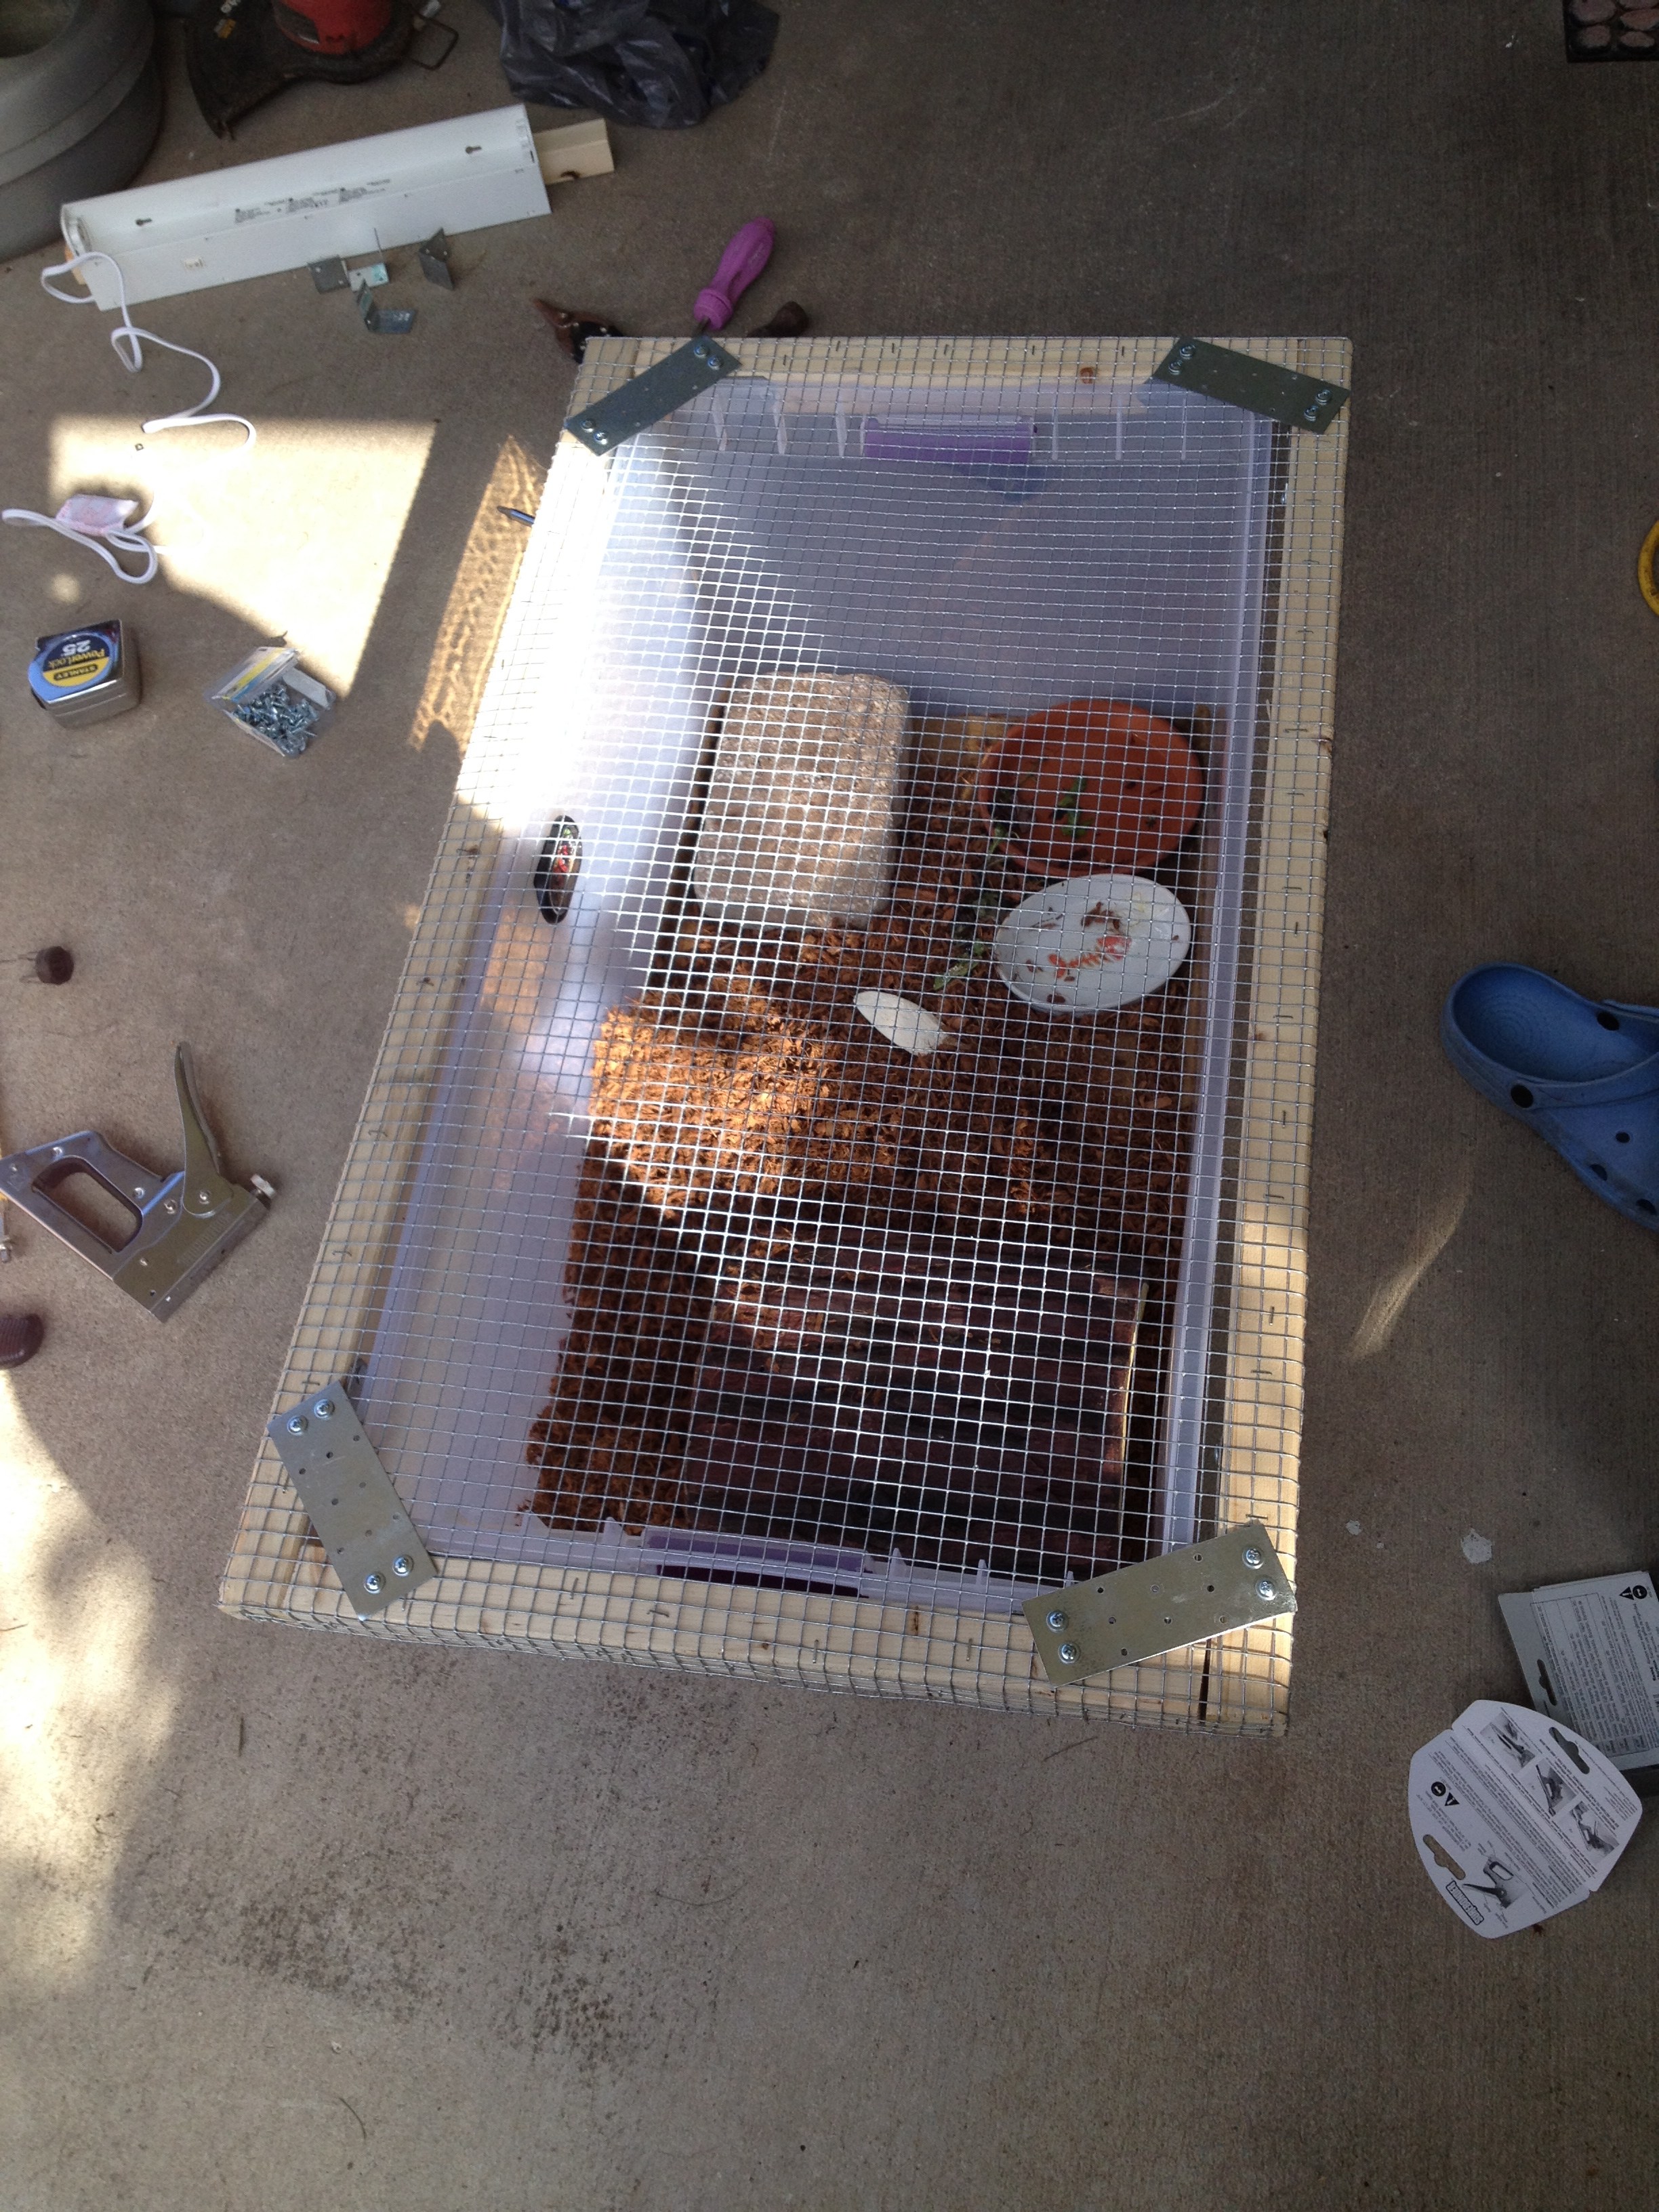
Get your hardware cloth or mesh or whatever and lay it out over the top. You want it to overlap on all four sides. Fortunately, the size hardware cloth I got was perfect width, so all I had to do was cut it to length. (BE CAREFUL! I forgot the shit is springy and when I made the final cut it sprang back and pointed edges nailed my poor hubby in the forehead and drew blood, so weigh it down or have your helper hold it down with two hands or something if it’s hardware cloth or mesh that’s got some spring to it.)
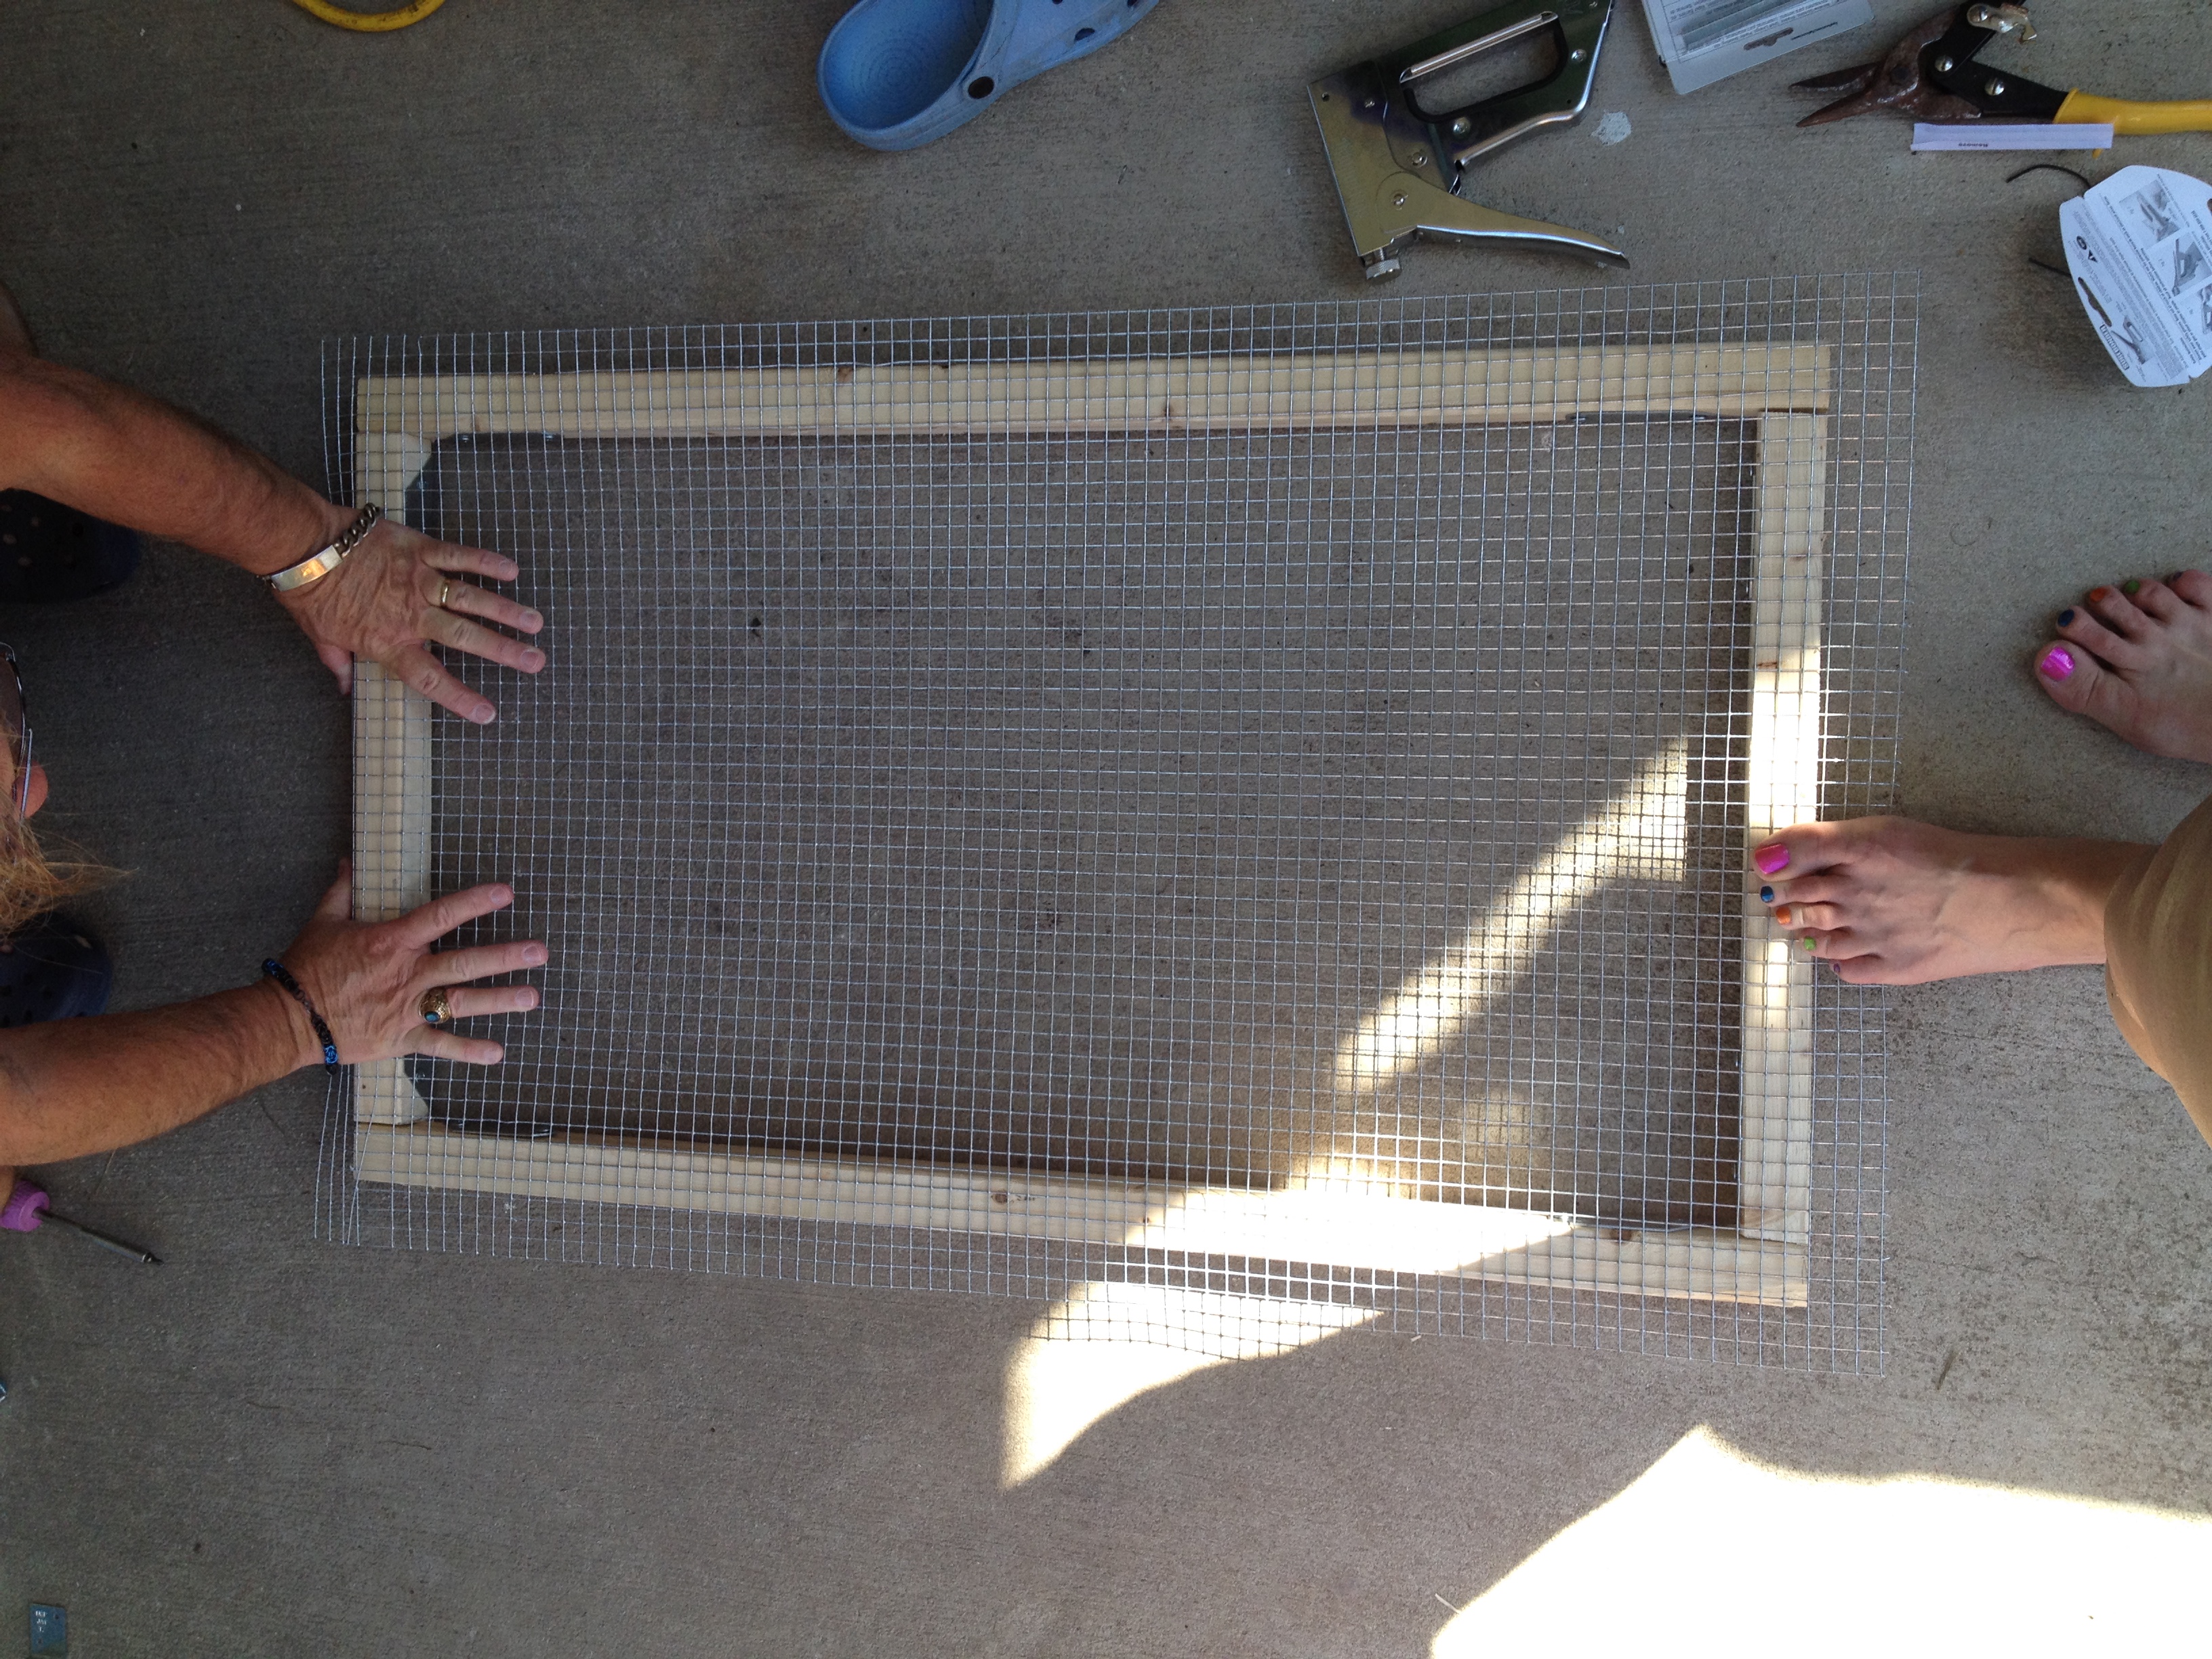
The reason you want to overlap it is because you’re going to staple it down on the edges for extra security and for stability for the frame. First, staple it all along the top to hold it in place. Use the hammer to tap them in if necessary. How many staples you put in is up to you. I used a bunch.
Then, cut 90-degree corners out of each overlapping corner of mesh. That makes it easier to fold the mesh over and secure it.
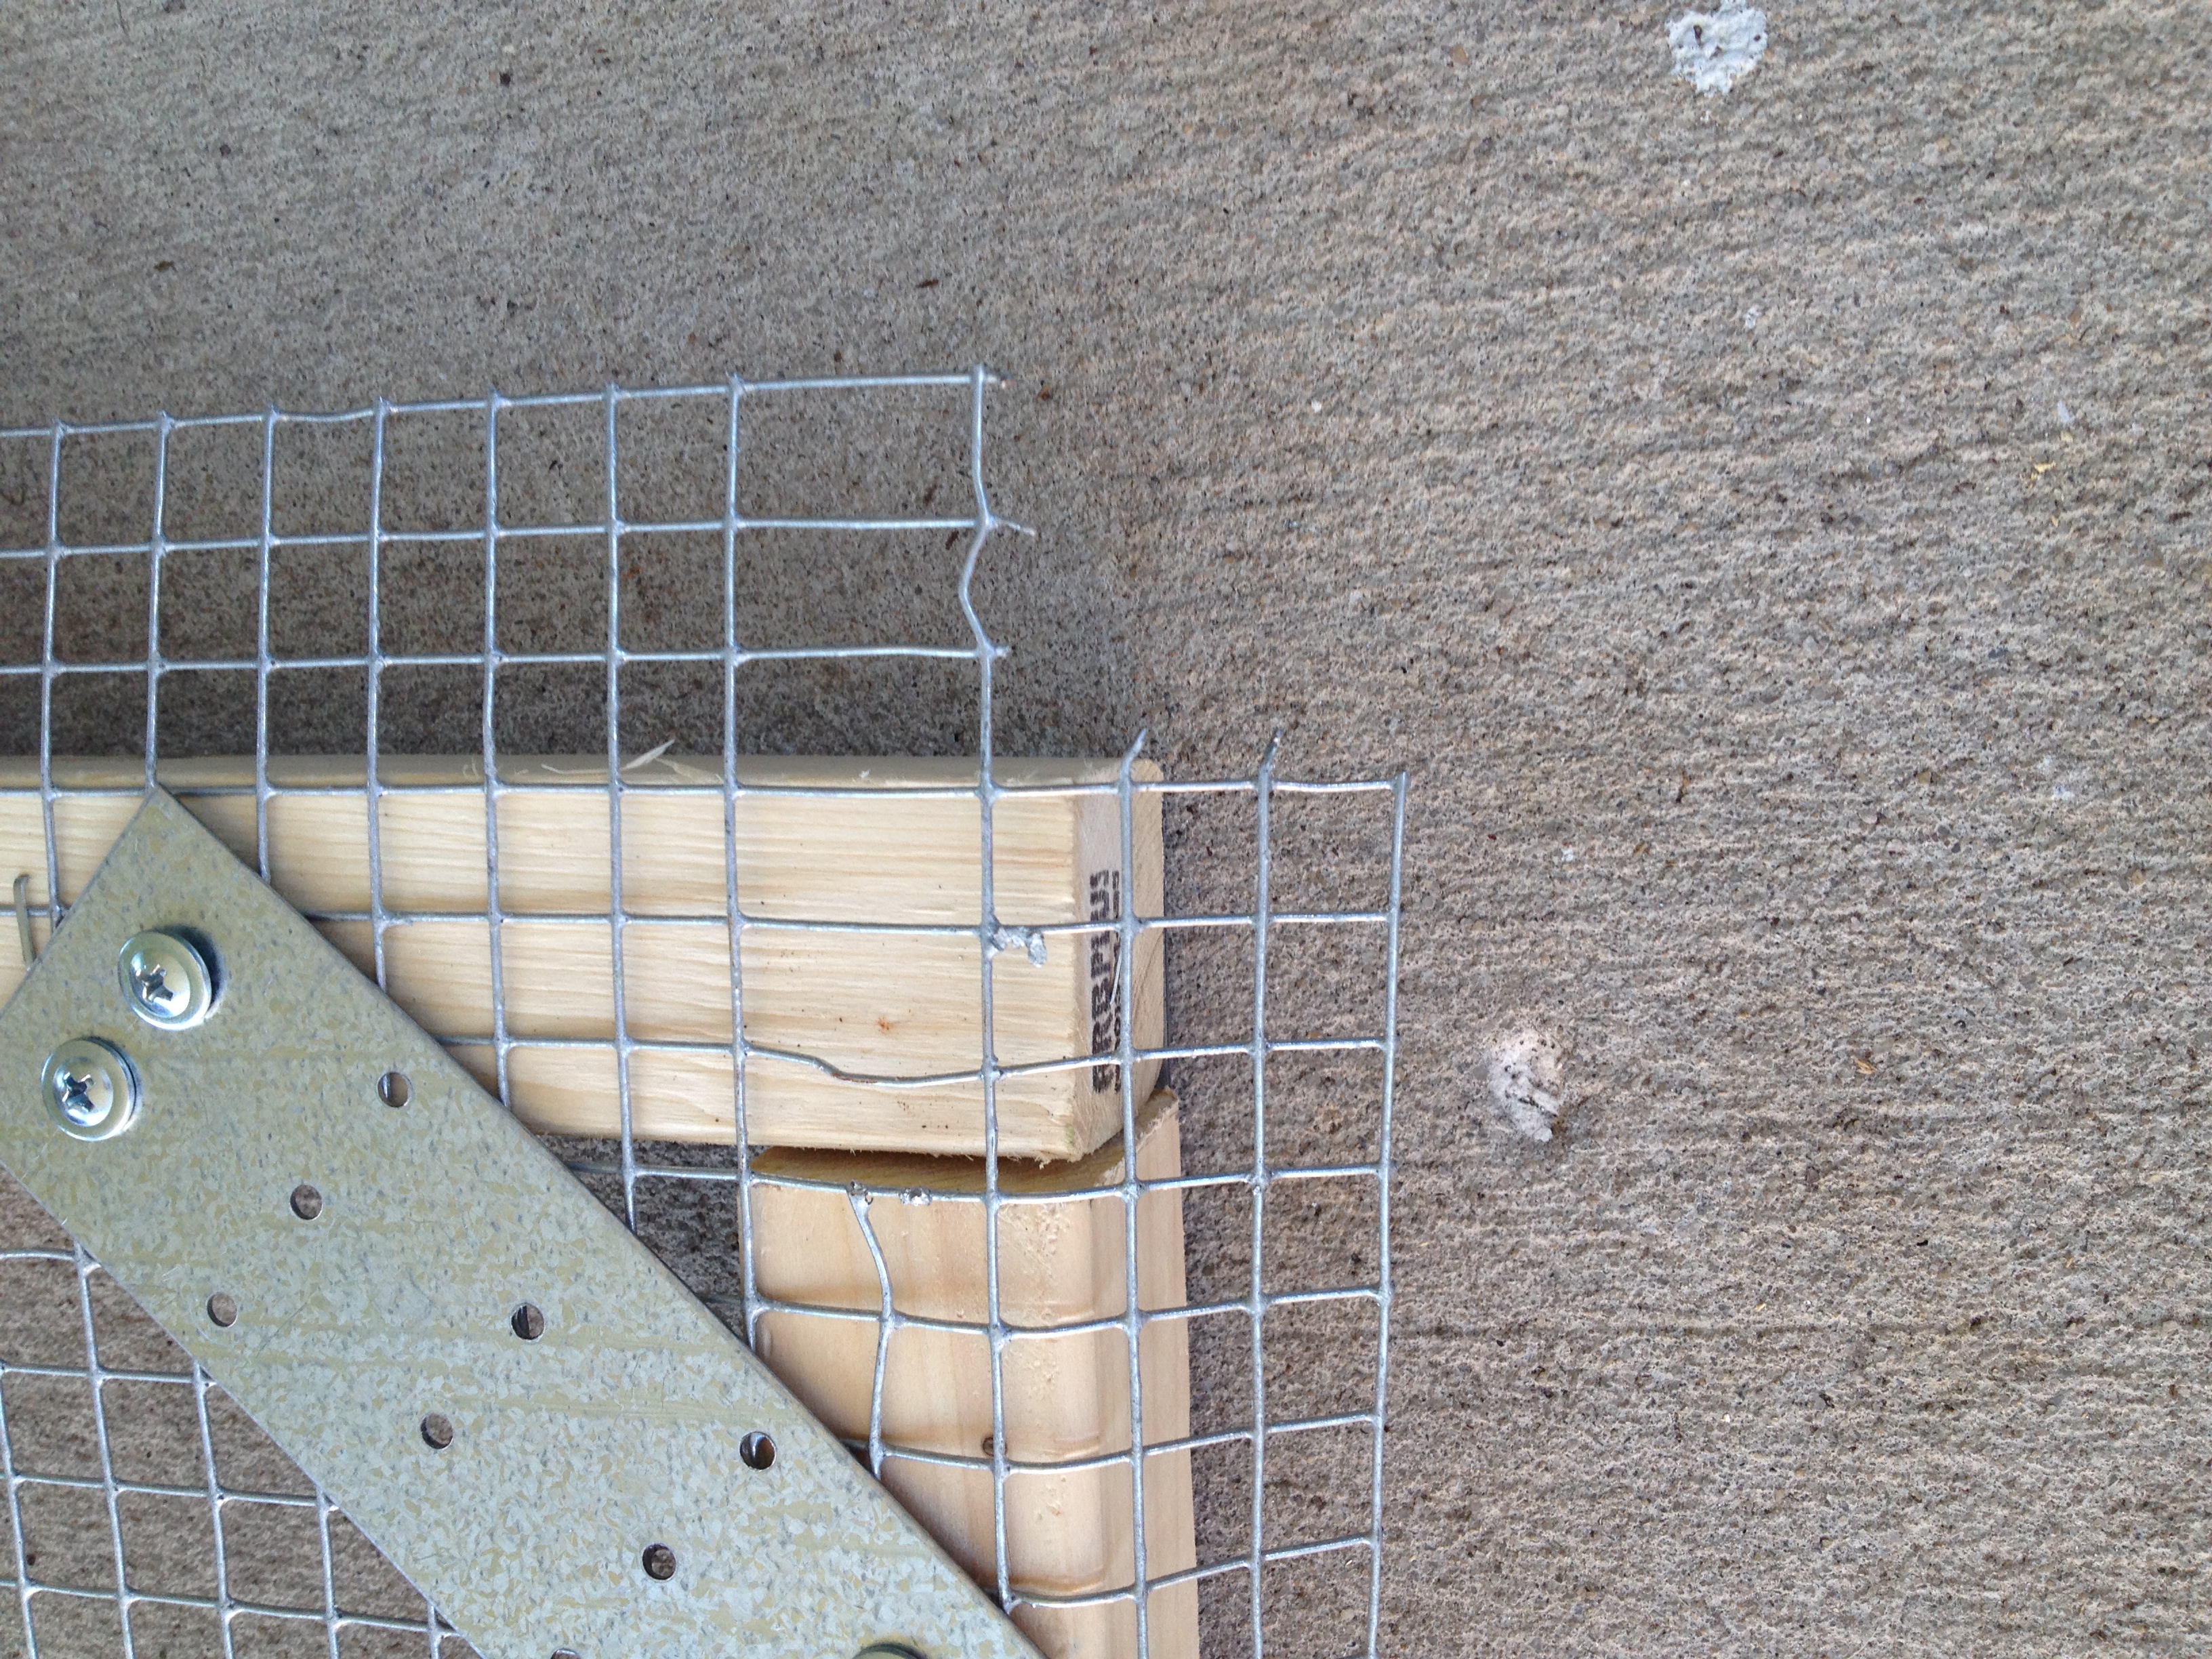
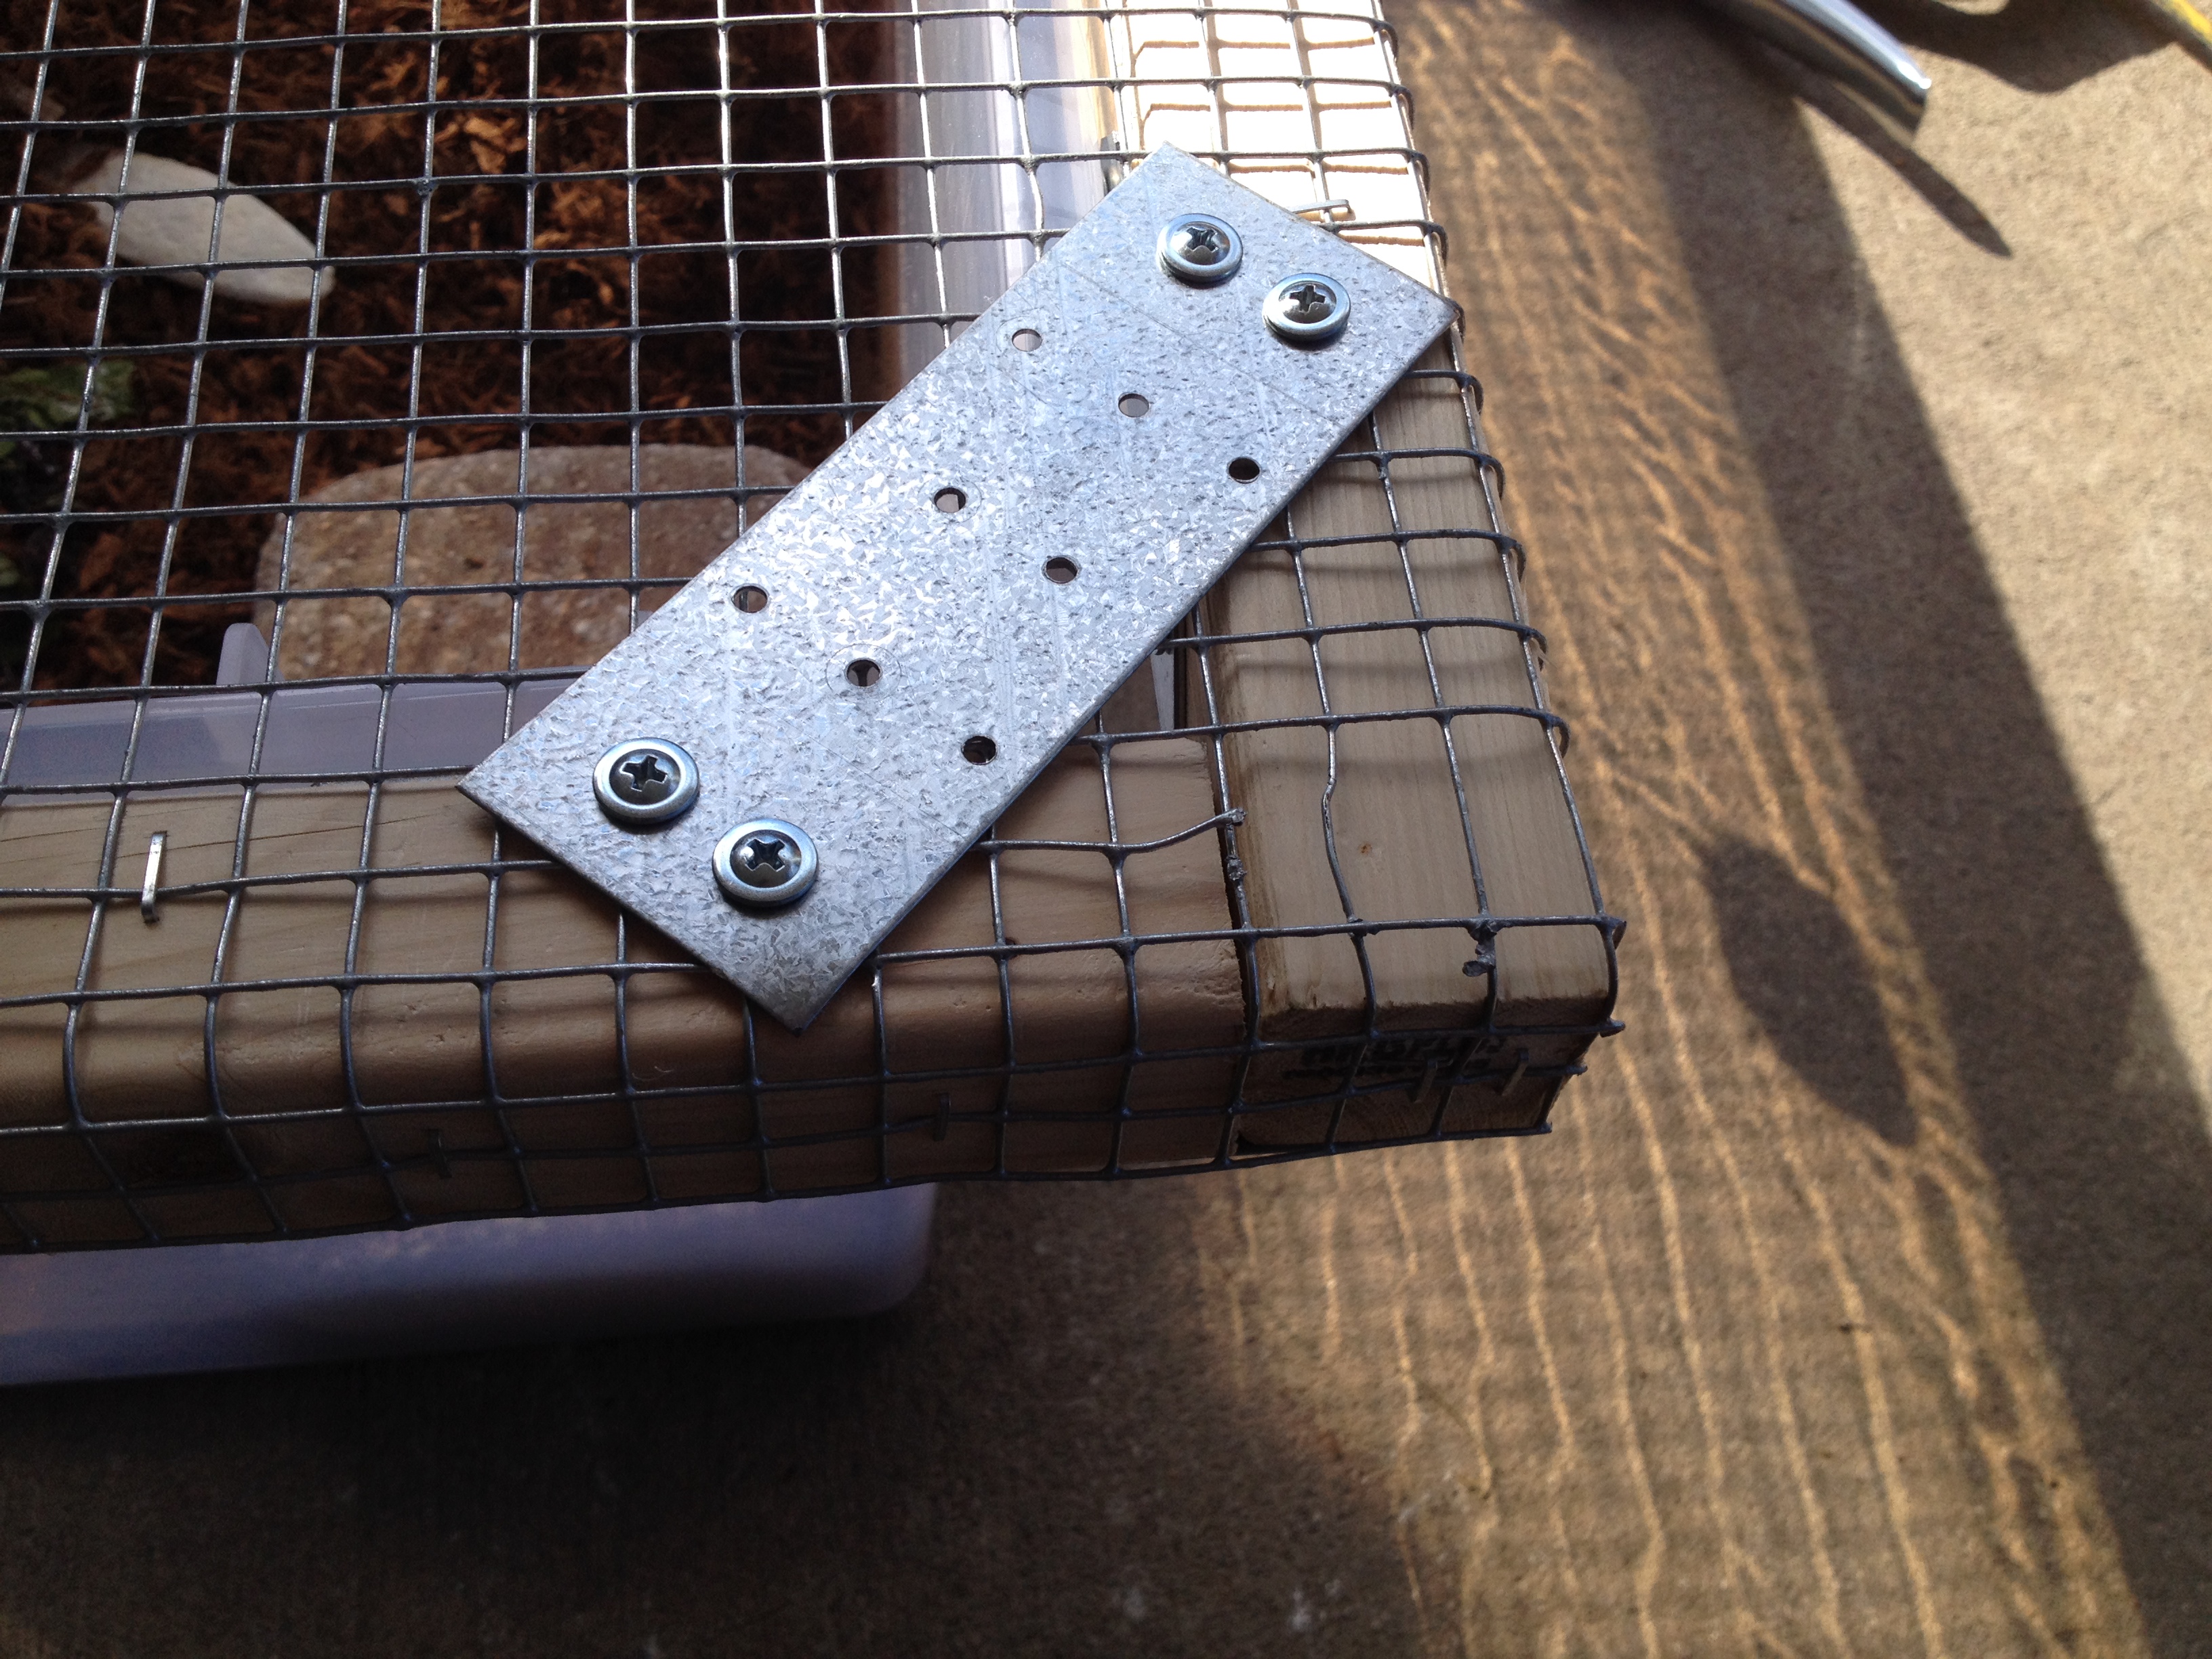
Now, take the plate brackets and screw them down diagonally on top of the mesh (like the above picture). This gives extra stability to the corners, especially if, like in my case, the top rests over the tank. (It’s not pressing on the hardware cloth. ESPECIALLY important step if you are using a softer screen or mesh, because otherwise if the top sits over the tank, it can push through from the weight of the frame.
Excuse the mess in his tank. Hurricane Sheldon had already destroyed his breakfast and I figured it wasn’t worth cleaning it up until after I’d finished this and moved everything back inside again. LOL

See what I mean about the corner brackets? It’s extra stability. (Yes those pictures are a little out of order. Shut up.)
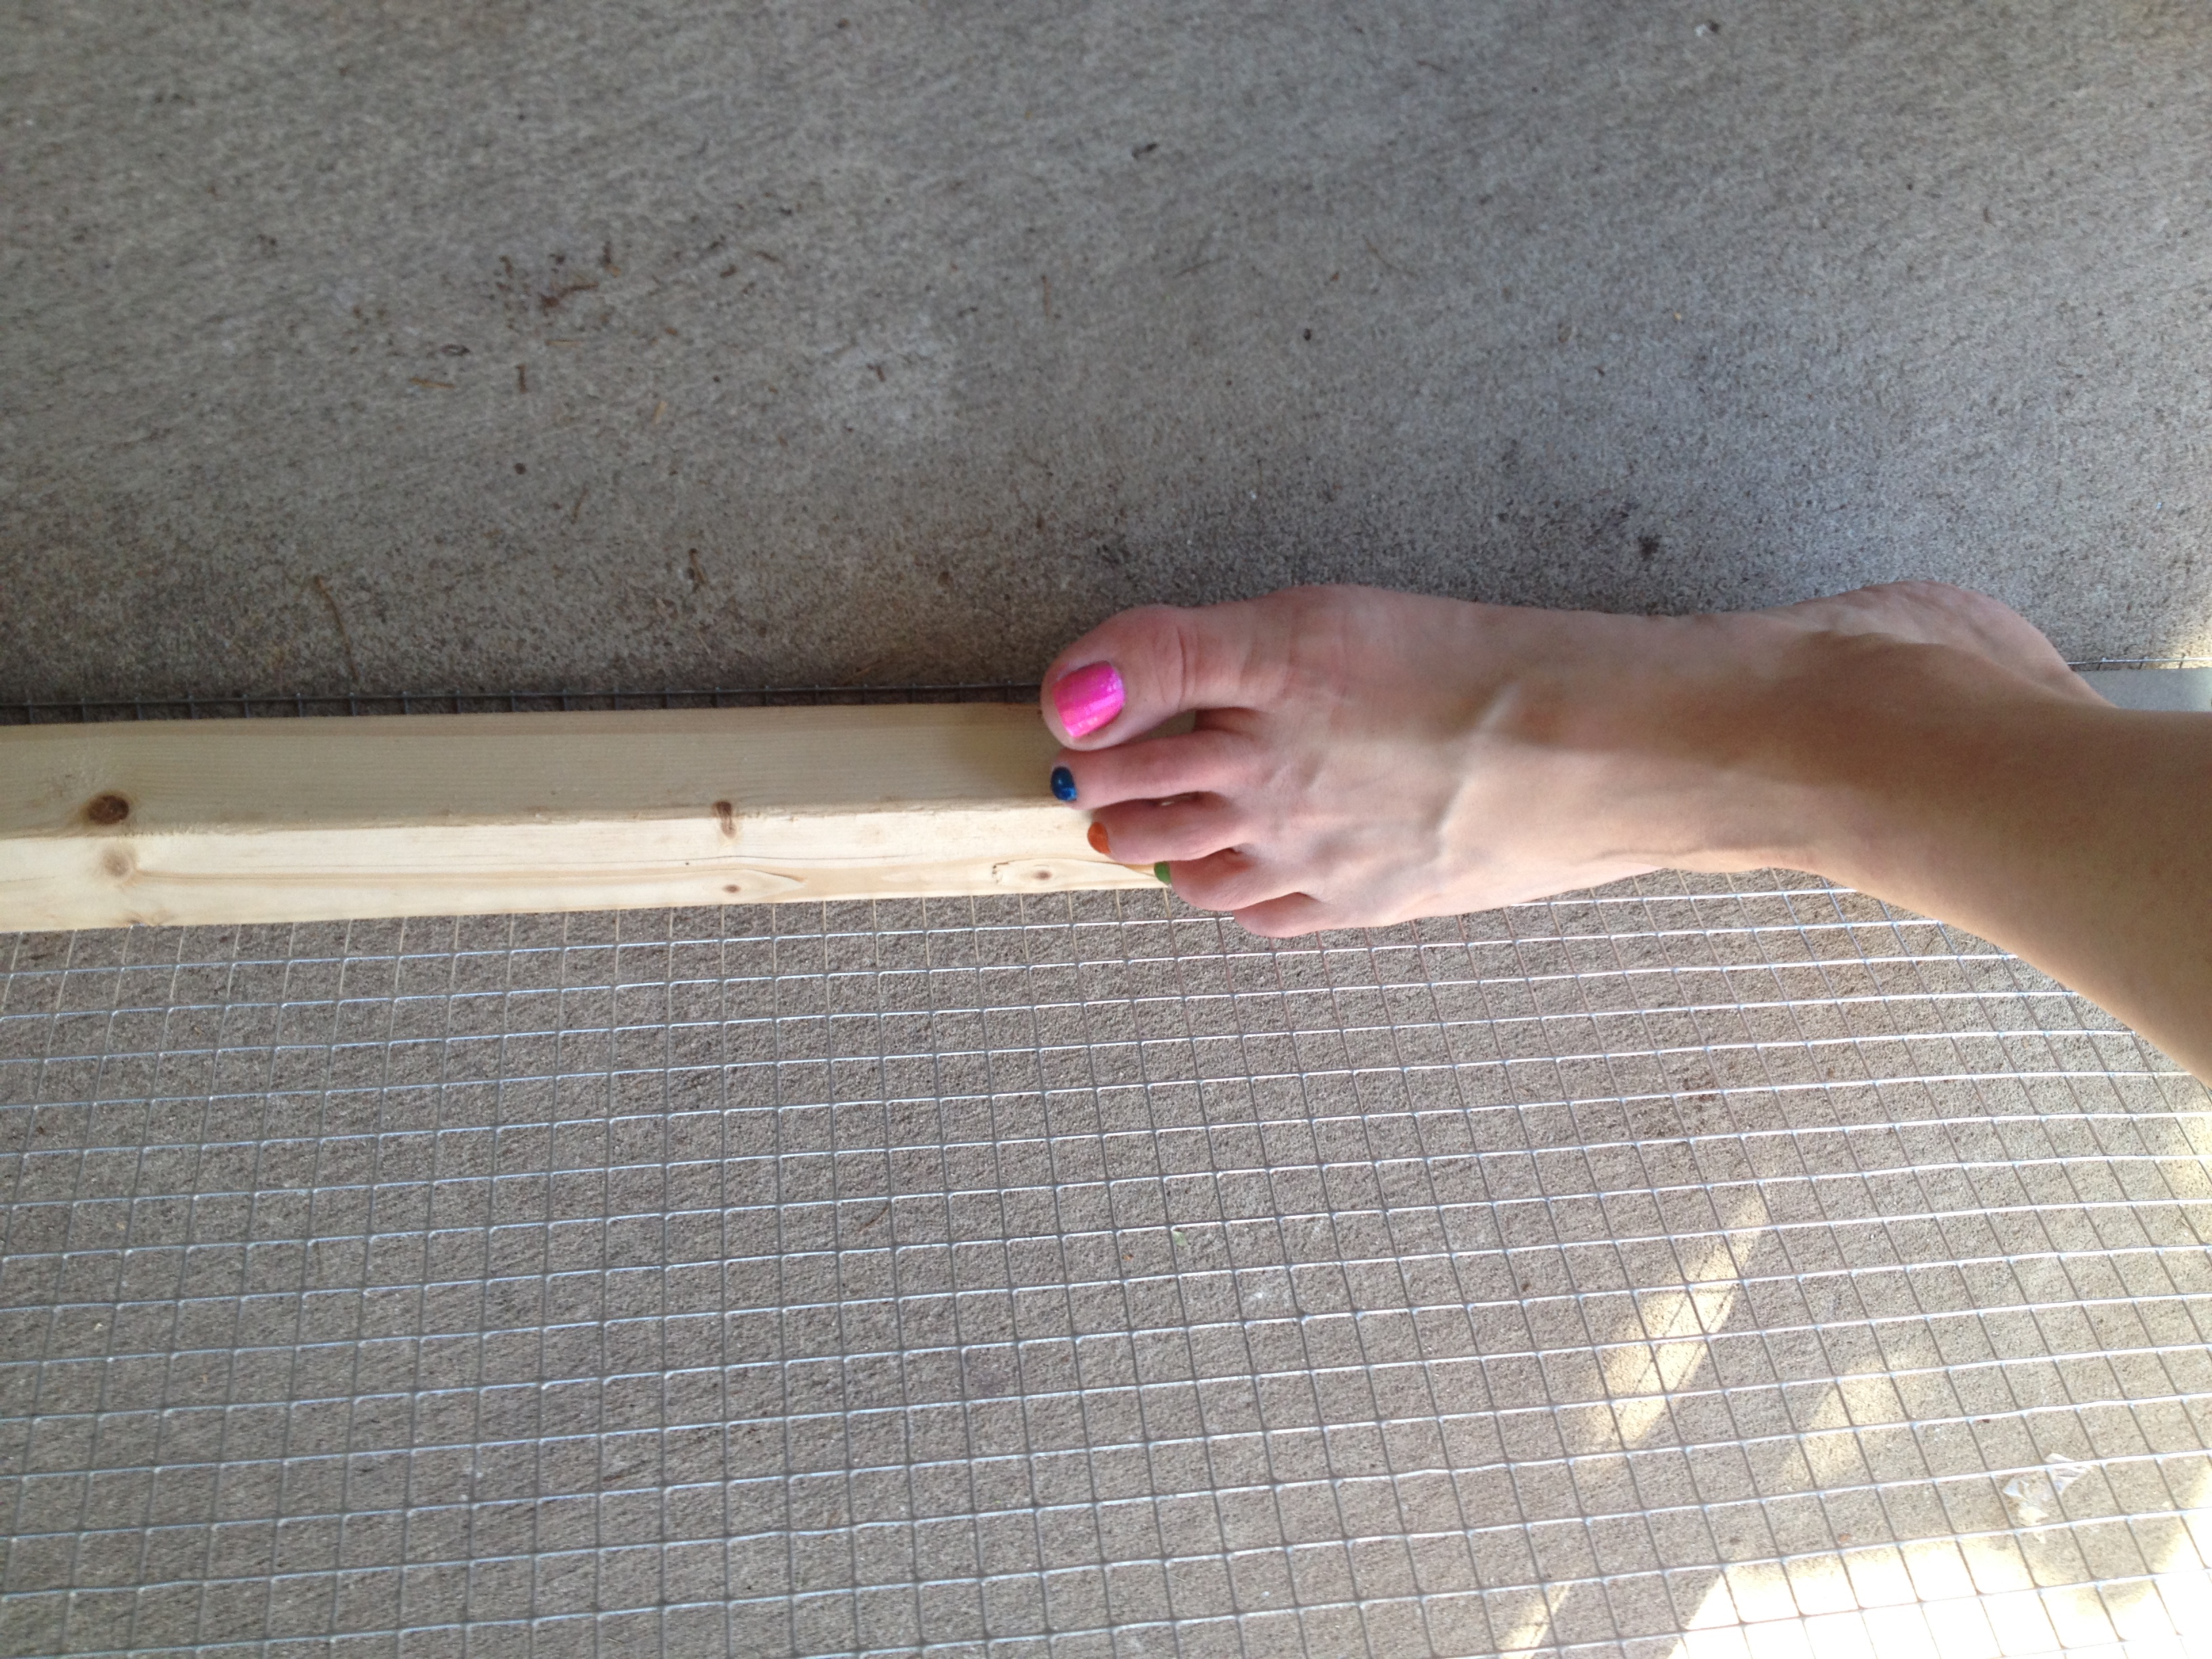
Now, here is the EASY way to fold the hardware cloth over. Just use your foot braced on the inside of the frame and gently press down as you roll the frame toward you. (Beats trying to do it by hand.) Do it for all four sides, then staple around the edges like you did the top.
These are the kind of staples I used. On the back it said 3/8″ was recommended for hardware cloth. If you’re using a lighter plastic mesh, you could get away with 1/4″ probably.
If the plates stick out a little on the edges, or if any pokey points of the hardware cloth stick out, just gently tap them with the hammer to round them off, the way I did below. (Like I said, this is not rocket science.)
Now, that’s your basic top. Pretty much done and useable as-is.
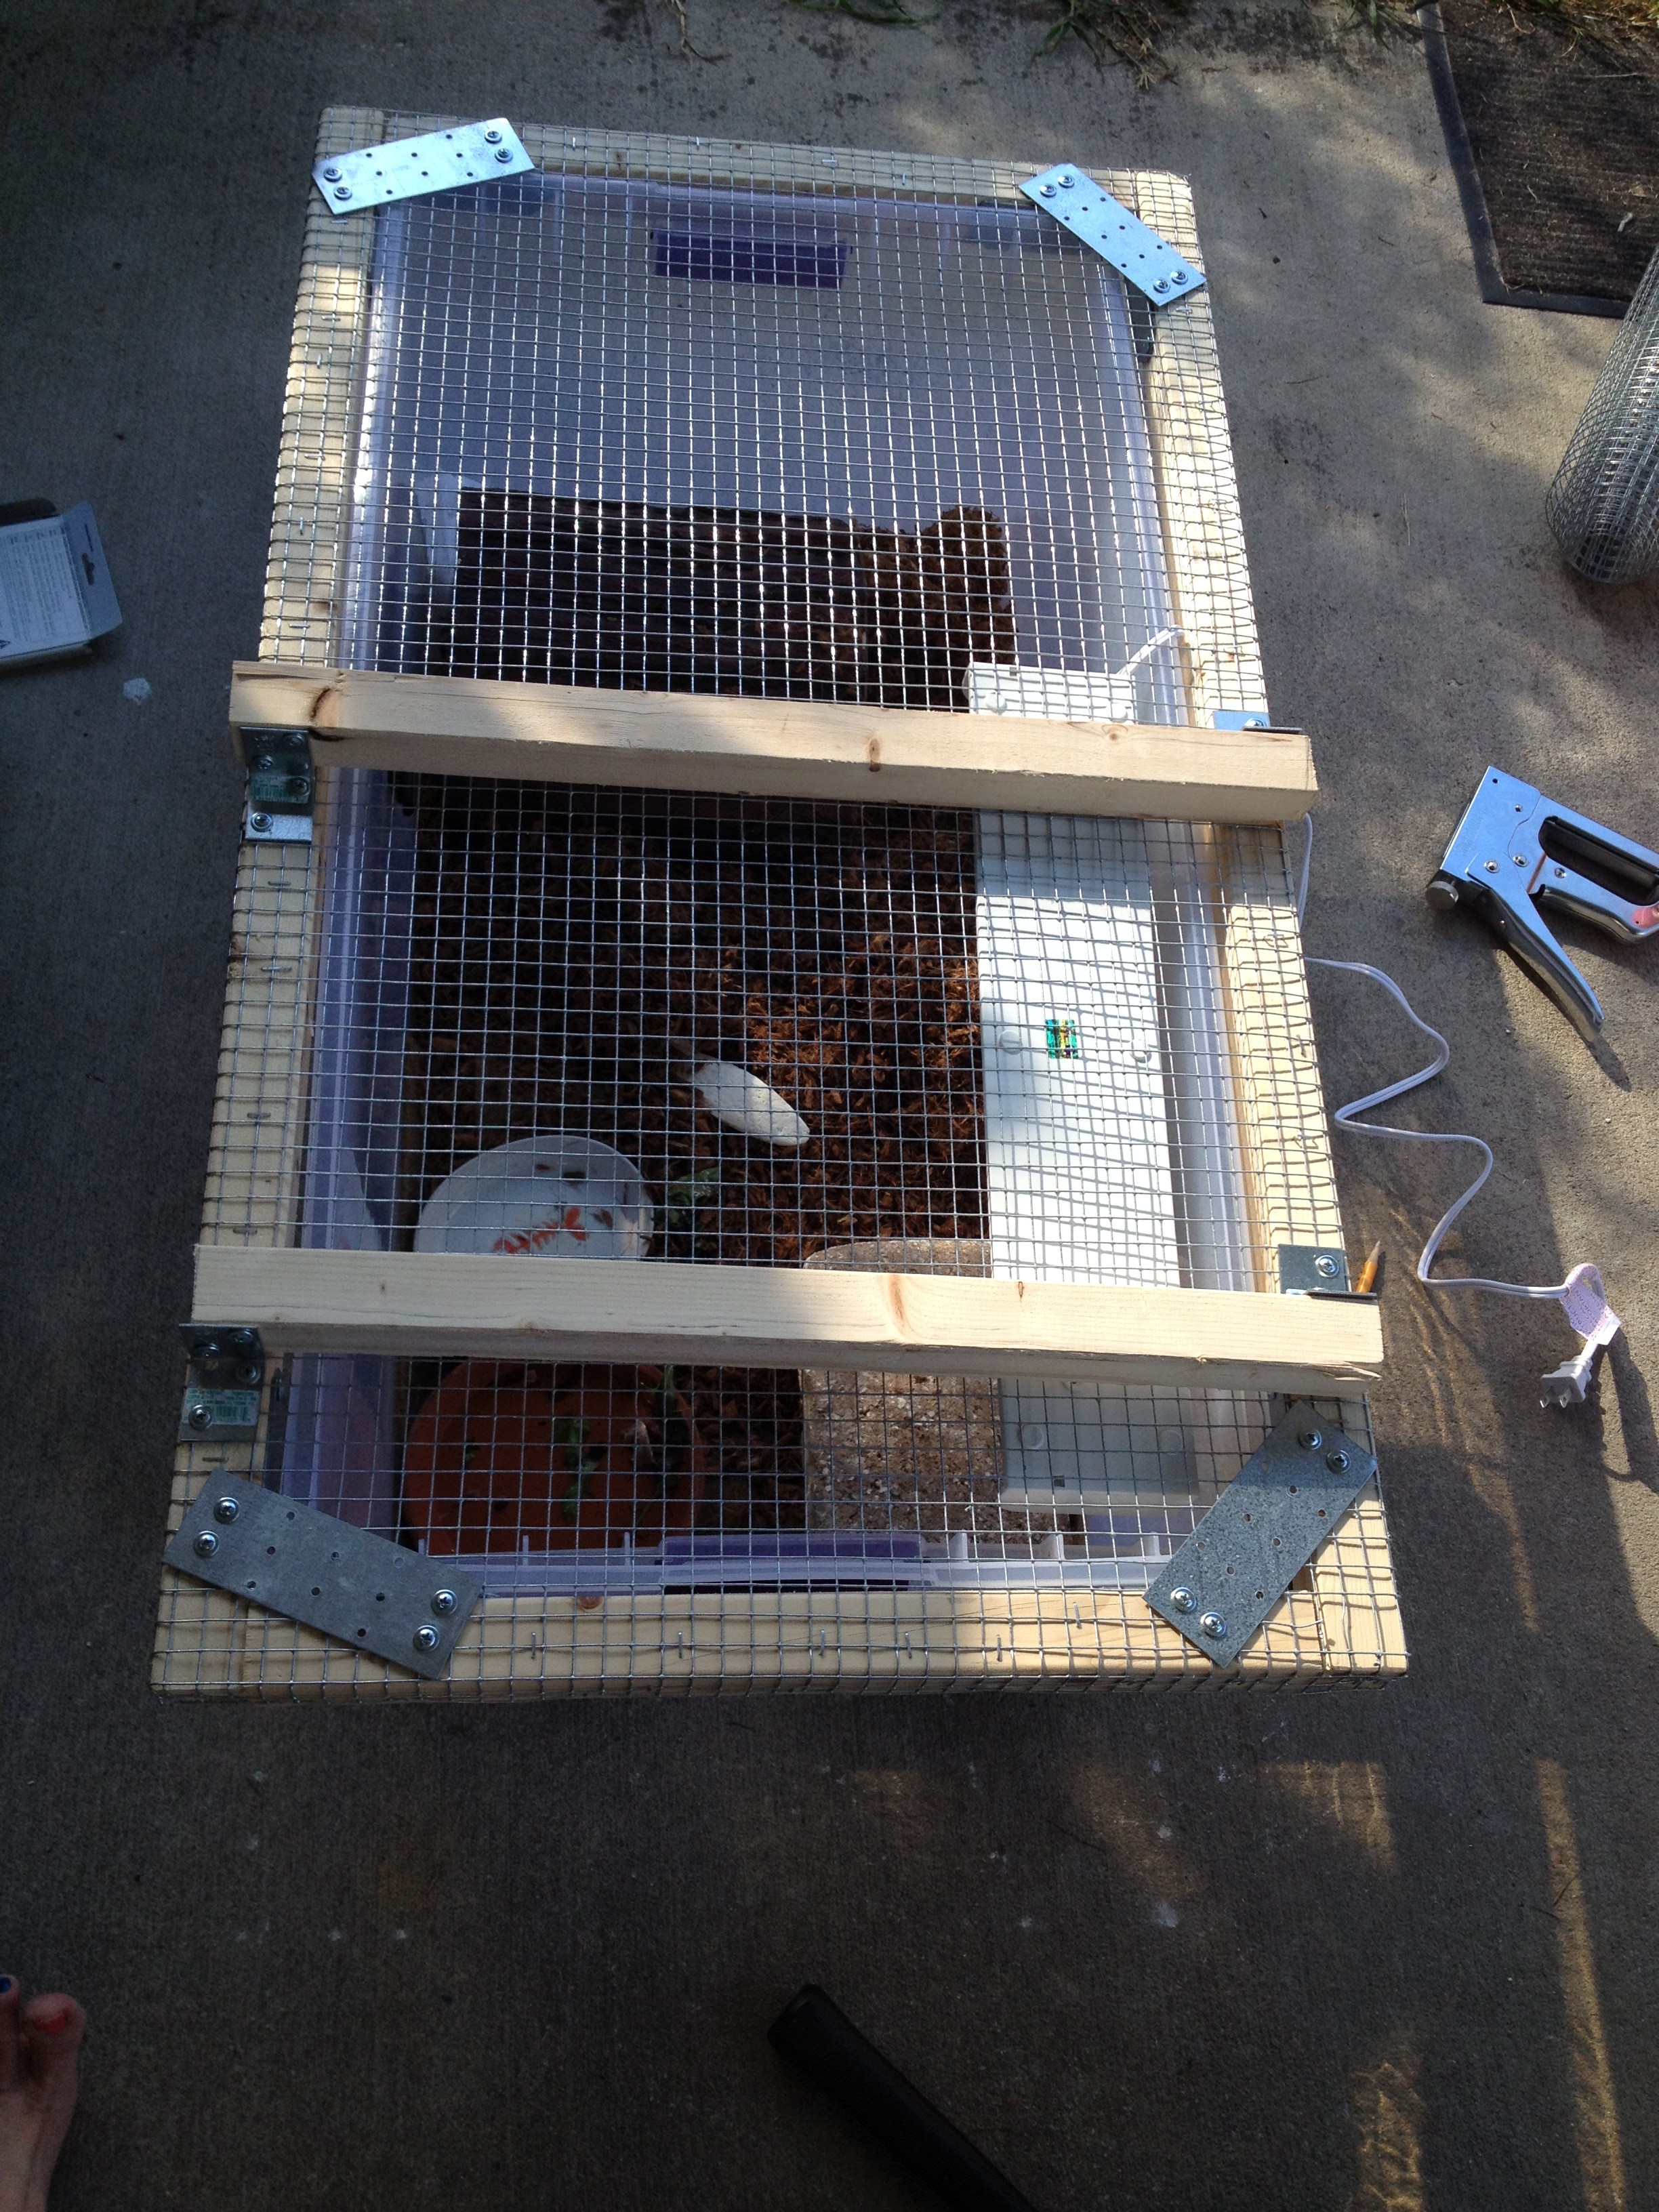
However, I knew I wanted cross-pieces added for strength, and to mount the light fixture for the UVB light inside. So this is where the L-shaped brackets come in handy. Cut two pieces of 2x to fit across the top. Figure out where you need them so you can mount the light fixture to them. This is me figuring the placement. NOTE: You do NOT want the light flush up against the side of the tank. Give it a little “breathing” room to help prevent anything from melting/catching fire.
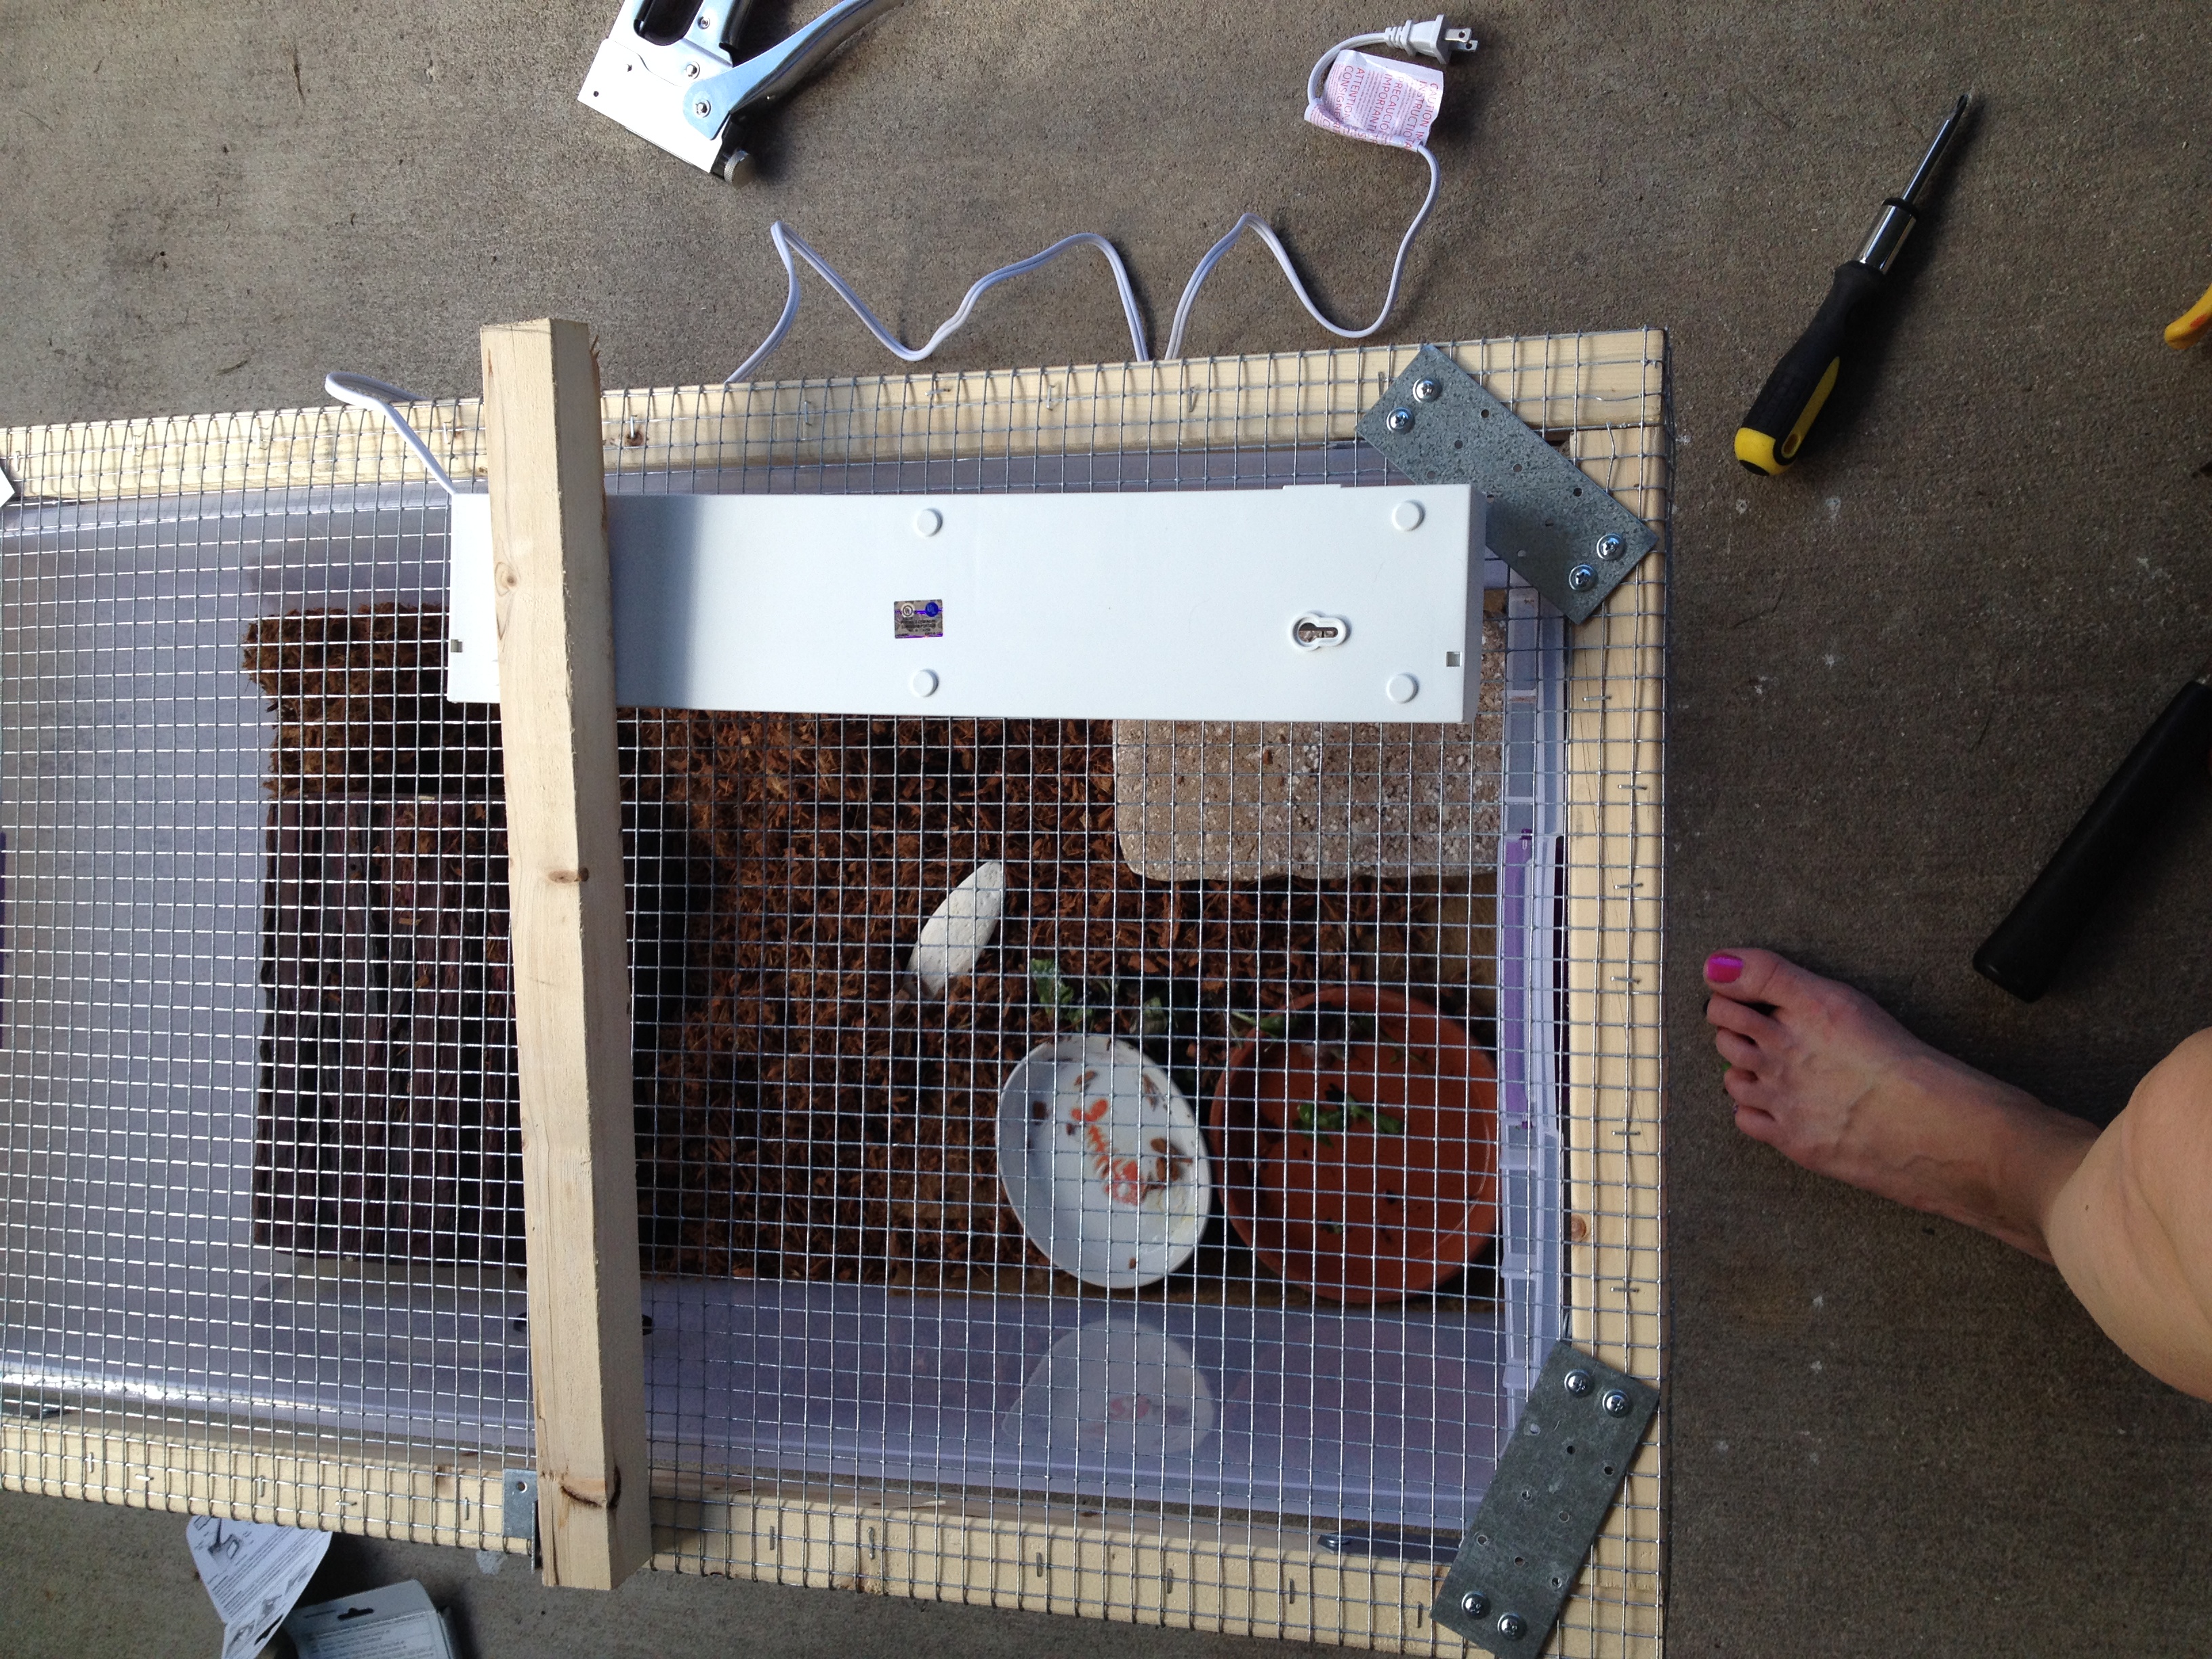
Once I figured out where I wanted the light mounted, I screwed the cross pieces in place, then flipped the top over and mounted the light.
Done.
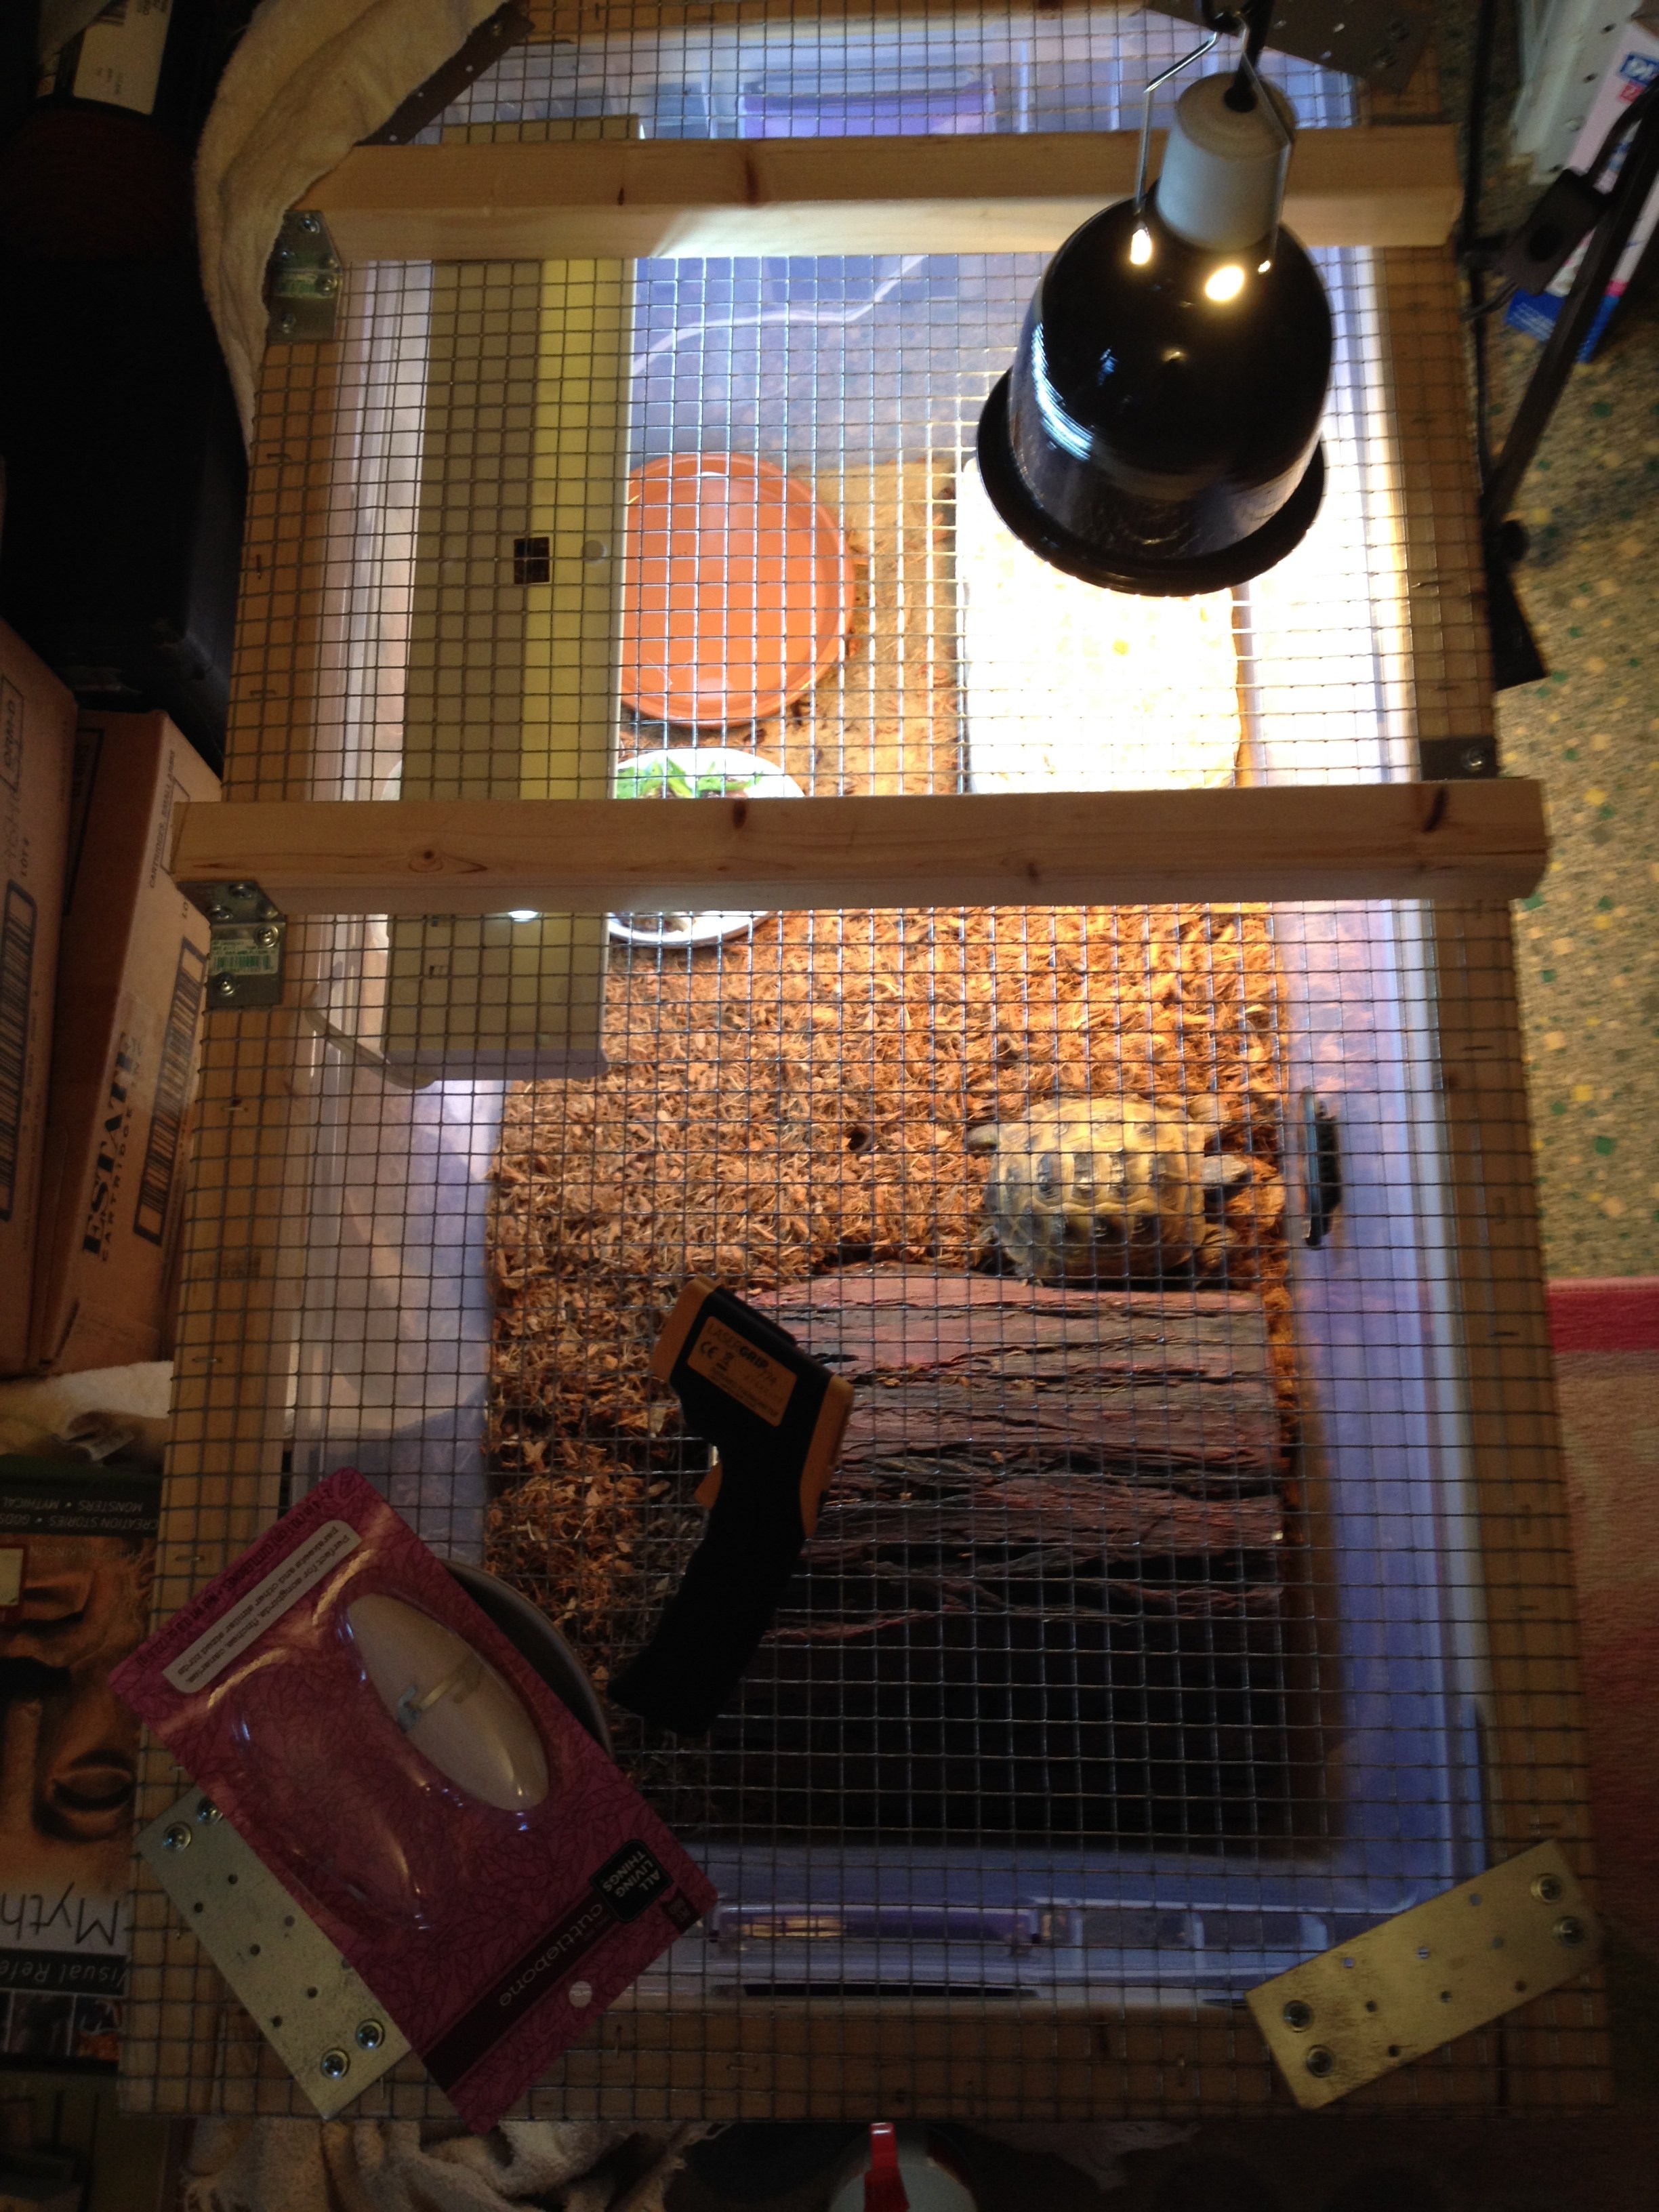
And this is what it looks like back in my office. I have his basking light right up against the mesh. The basking rock is actually a paving stone from Lowe’s that was a whopping $.75 (yes, big expense, I know, almost a whole dollar LOL). Yes, that’s an IR thermometer gun I got from Amazon for about $18. This way, I have a couple of micro-climates for him. I’m playing with different bulbs for the basking light, right under it is around 90-95 degrees right now (I need to experiment with a larger wattage bulb). By his food and water, it’s about 85. Under his hide, it’s about 75. So he gets good air circulation with this. I’ve got coconut coir in there now, I need to add some topsoil, but his humidity is in a pretty decent range. It should be beefy enough if one of the cats gets on top of it, but it’s also too heavy for the cats to lift off.
The only drawback is that I have to lift the top to turn off the light. I could plug both the basking light and the UVB light into a powerstrip, but I don’t want to (old house, old wiring). I do NOT have the plastic cover in place on the light fixture (came with it) otherwise it sort of defeats the whole purpose of having a UVB light in the first place. So if you have a critter that needs a UVB light, and it can jump or something, you might want to rethink the engineering and put the light outside the top.
If you needed to make a larger top, you could easily use the L-shaped brackets (even two on each end of the crosspieces, instead of one on each end like I used) to make interior braces, lengthwise or crosswise. Or if you have a long bookcase or something that you’ve turned into a tortoise table, make two lids for it that can be opened separately. You can add hinges to one side, hook-and-eye catches, or whatever, to make them more secure. It’s up to you.
Another option? Place the cross-piece/s where you want them, and just cut two little pieces of wood to use to mount the light underneath the mesh. As long as the light isn’t so heavy it’ll pull on the mesh and pull through, but that’s not a problem with hardware cloth.
Eventually, I’ll get his outside run done and post a tutorial for that, too. Hope this was helpful.
Any questions? Feel free to post them in the comments. Thanks! 🙂
Tymber if you want to avoid taking the top off to turn off the light put a switch in the line cord – it might cost a few dollars to get one. most of the pierce the wires and the screw tight – then you can turn the light on and off without removing the top.
like this or with a roll switch – standard item at home depot/lowes or walmart
http://www.amazon.com/Compact-White-Plastic-In-line-Switch/dp/B00MAE2SHM/ref=sr_1_1?ie=UTF8&qid=1413766458&sr=8-1&keywords=in+line+rocker+switch+%2B+power
we built a 6Lx4Hx3D foot cage for our three cockatiels – we put a heat bulb in the lamp when it gets cold.
FYI I love you pet tidbits and you DIY projects
@Paris – Thanks for the tip! 🙂 And thanks for reading!